


How to Check Your Engine Oil the Right Way: A Practical Guide for Safe Vehicle Care
Checking your engine oil is a quick, low-effort check that prevents many expensive problems by confirming your engine is properly lubricated, cooled, and free of harmful contaminants. This guide shows why oil level and condition matter, when to check (including after a collision), the correct dipstick technique, how to read oil color and markings, and safe next steps if oil is low or overfilled. If you’re worried about post-accident damage or get a confusing reading, a local shop with OEM-quality repairs and certified technicians can give a definitive inspection. Prime Time Collision Center in Glendale offers I-CAR Platinum certified techs, complimentary post-accident inspections, and help with insurance claims when you need a professional follow-up. The article is broken into clear, practical sections with step-by-step instructions, quick lists, and simple tables so you can check oil correctly and act fast if something’s off.
Why checking engine oil matters for your car’s health
Checking engine oil is a basic diagnostic that confirms the lubrication system is working and the oil isn’t contaminated. Oil reduces wear by lubricating bearings and moving parts, helps carry heat away from friction points, and traps contaminants so the filter can remove them. When oil level or quality drops, those protections weaken. Regular checks help you spot leaks, burning oil, or contamination early and avoid damage that leads to costly repairs. Knowing what to look for in level and color also tells you whether a simple top-up will do or if a technician should take a closer look—especially after a collision, when hidden damage can cause leaks.
How engine oil supports performance
Engine oil lubricates pistons, camshafts, crankshafts and other moving parts to cut metal-on-metal friction and slow wear. It transfers heat away from contact surfaces and helps the engine run at stable temperatures, which keeps combustion efficient and prevents thermal stress. Oil also suspends soot and tiny particles, sending them to the filter so they don’t grind away at internal parts. That’s why keeping the right oil level and condition is a simple, powerful way to protect engine life—and why a dipstick check gives useful insight into how the engine is doing.
Risks of low or dirty oil
Low or contaminated oil means more friction, higher operating temperatures, and abrasive particles that can score bearings and cylinder walls. Symptoms include knocking noises, reduced power, oil pressure or check-engine lights, and in severe cases seized parts or catastrophic failure. Oil that’s thick, won’t flow properly, or looks milky (a sign of coolant) needs immediate attention to avoid head gasket or internal damage. Spotting these problems early tells you when to act and when to call a professional to find the leak or contamination source.
When and how often you should check engine oil
Regular checks keep your engine protected and help you catch problems early. As a baseline, check oil monthly and before long trips; increase frequency for high-stress use. If you tow, do a lot of city stop-and-go driving, run your vehicle in extreme temperatures, or have a high-mileage engine, check more often—those conditions speed up oil consumption and degradation. After any collision, even a minor one, inspect for visible leaks or contamination and schedule a professional inspection if readings look off or you hear new noises. The table below summarizes suggested check intervals so you can decide how often to inspect oil.
Introductory table: recommended oil check intervals by driving condition and special cases.
| Condition | Frequency | Recommended Action |
|---|---|---|
| Normal driving (daily commute, mixed roads) | Monthly | Check level monthly and before long trips |
| High-stress use (towing, heavy loads, performance driving) | Every 1-2 weeks | Inspect level and condition; top up as needed |
| Severe climates (hot or cold extremes) | Every 2 weeks | Check for increased consumption or thickening |
| Post-accident or visible impact | Immediately and 24–48 hours after | Inspect for leaks, milky contamination; seek pro if abnormal |
Use this schedule as a practical checklist to protect engine health; post-accident checks are high priority and may require a shop follow-up.
How accidents change how often you should check oil
Collisions can dent the oil pan, loosen the drain plug, damage oil lines or seals, or introduce contaminants. That’s why you should check oil right after an accident. Even if the car seems driveable, look for puddles under the vehicle, a burning oil smell, or sudden drops in oil level—these are signs of a leak that will worsen with driving. If you see milky oil, foaming, or a rapid fall in level, stop driving and arrange a professional assessment: coolant contamination or structural damage may be present. A prompt inspection also helps document issues for insurance claims.
Recommended oil check intervals for reliable care
For most drivers, a monthly dipstick check plus oil changes as your owner’s manual recommends is a sensible balance. Increase the checks for heavy use or suspect conditions. Check before long trips and inspect weekly if towing or doing performance driving so you can catch rising consumption or leaks early. After any collision or when dashboard warnings appear, have a technician do a thorough fluid inspection—this avoids guesswork and keeps you safe. Keeping a simple log of readings helps technicians spot slow trends like steady oil loss or recurring contamination.
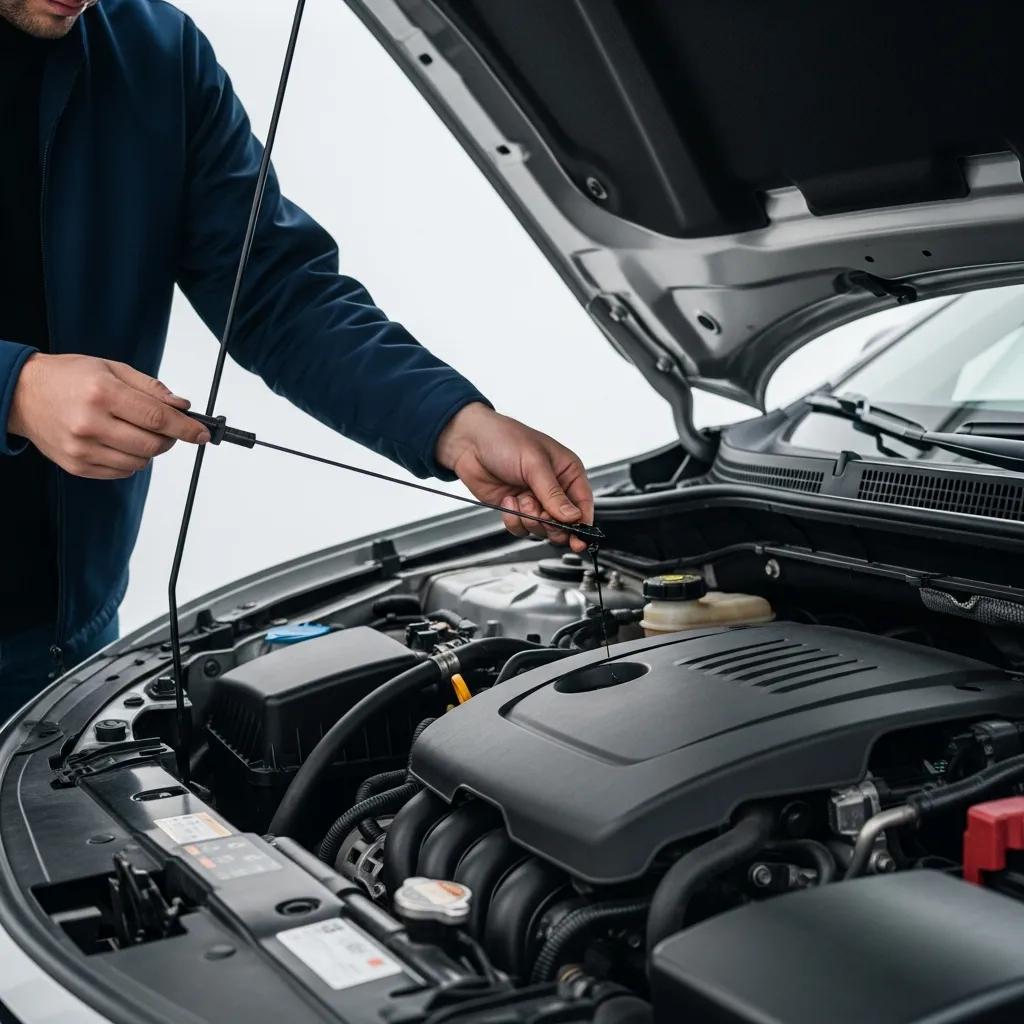
How to check your engine oil with a dipstick
Using the dipstick is a quick and reliable way to check oil level and get a basic read on oil condition. It takes only a few minutes and a consistent technique for accurate results. Always check on level ground, follow your owner’s manual on engine temperature, and use a clean rag and funnel if you need to add oil. The steps below apply to most passenger vehicles—refer to your manual for model-specific details.
Before you start, gather a rag, a funnel, and the owner’s manual, and park on level ground—these small steps reduce reading errors and keep things safe.
- Park and prepare: Park on level ground, set the parking brake, and turn off the engine. If the engine was hot, wait 5–10 minutes so oil can settle back into the pan.
- Locate and remove the dipstick: Open the hood, find the dipstick (look for the bright handle), pull it out, and wipe it clean with the rag.
- Check and read: Reinsert the dipstick fully, pull it out again, and read the oil level against the markings. Note the oil’s color and texture.
- Record and act: If the level is below the minimum mark, add oil in small amounts and recheck until it’s within range. If the oil is overfilled or shows contamination, seek professional advice.
Following these steps avoids common mistakes—reading on a slope, not inserting the dipstick fully, or relying on a hot-only reading—and gives a dependable basis for topping up or booking service.
How to prepare your vehicle before checking oil
Preparation is about safety and consistency: park level, set the parking brake, and let the engine cool a few minutes so oil drains to the pan. Have a clean rag, a funnel for topping, and your owner’s manual handy to confirm dipstick location and the correct oil grade. Avoid checking immediately after hard driving if you want a cold-level reading for trend tracking; if you check warm, be consistent so your records are useful. Proper prep helps you get a reliable dipstick reading to guide topping or scheduling service.
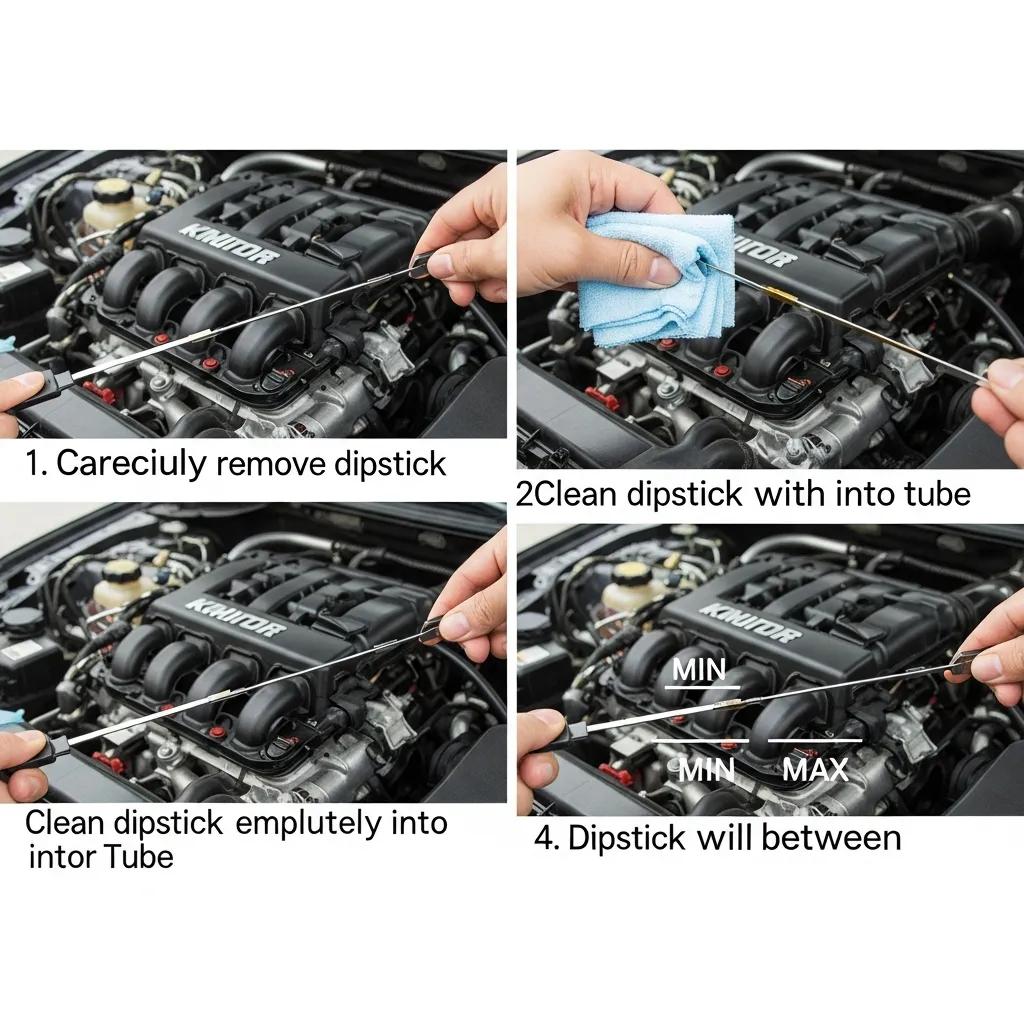
Step-by-step: reading the dipstick
Reading the dipstick means checking both level and condition. After wiping and reinserting the dipstick, compare the fresh mark to the MIN and MAX indicators and check color and viscosity. If the mark is between the indicators, the level is fine. At or below MIN means add oil; above MAX means the engine may be overfilled and needs correction. Color clues: clear golden = fresh, dark brown/black = used but not always urgent, milky/frothy = possible coolant contamination—get it inspected right away. Note what you see in a maintenance log if you keep one. If readings are inconsistent or the oil looks suspect, schedule an inspection for leaks, contamination, or fill errors.
How to interpret oil levels and condition
Interpreting oil readings combines dipstick markings with visual and tactile checks of color and viscosity to decide whether to add oil, change it, or bring the car to a shop. MIN and MAX show safe ranges—below MIN needs topping, above MAX risks overfill problems, and cross-hatch zones usually indicate the normal operating band. Oil appearance helps diagnose issues: light amber is healthy, dark is used (plan a change), and milky or frothy means possible coolant mixing and needs immediate attention. The short table below pairs conditions with the right action so you can decide quickly.
Introductory table: oil condition interpretation for level, color, and viscosity.
| Oil Condition | Attribute Observed | Interpretation / Action |
|---|---|---|
| Clear golden | Light color, free-flowing | Normal — monitor and follow scheduled change |
| Dark brown/black | Dark color, sticky consistency | Used — plan an oil change; inspect for heavy soot if very dark |
| Milky or frothy | Light tan or creamy, aerated | Possible coolant contamination — stop driving and seek inspection |
Combining level and condition helps you decide whether topping is safe or if contamination or leaks require a technician—protecting the engine and avoiding misguided DIY fixes.
What the dipstick markings mean: MIN, MAX, and cross-hatch
Dipstick markings are a quick visual guide: MIN is the lowest safe volume, MAX is the recommended full level, and cross-hatch/intermediate zones show the preferred operating band. If oil wets below MIN, add small amounts and recheck. If it sits at or above MAX, don’t add more—overfilling can cause foaming and crankcase pressure issues. For reliable trend spotting, record readings and conditions over time so you can detect slow consumption or leaks instead of reacting to a single measurement.
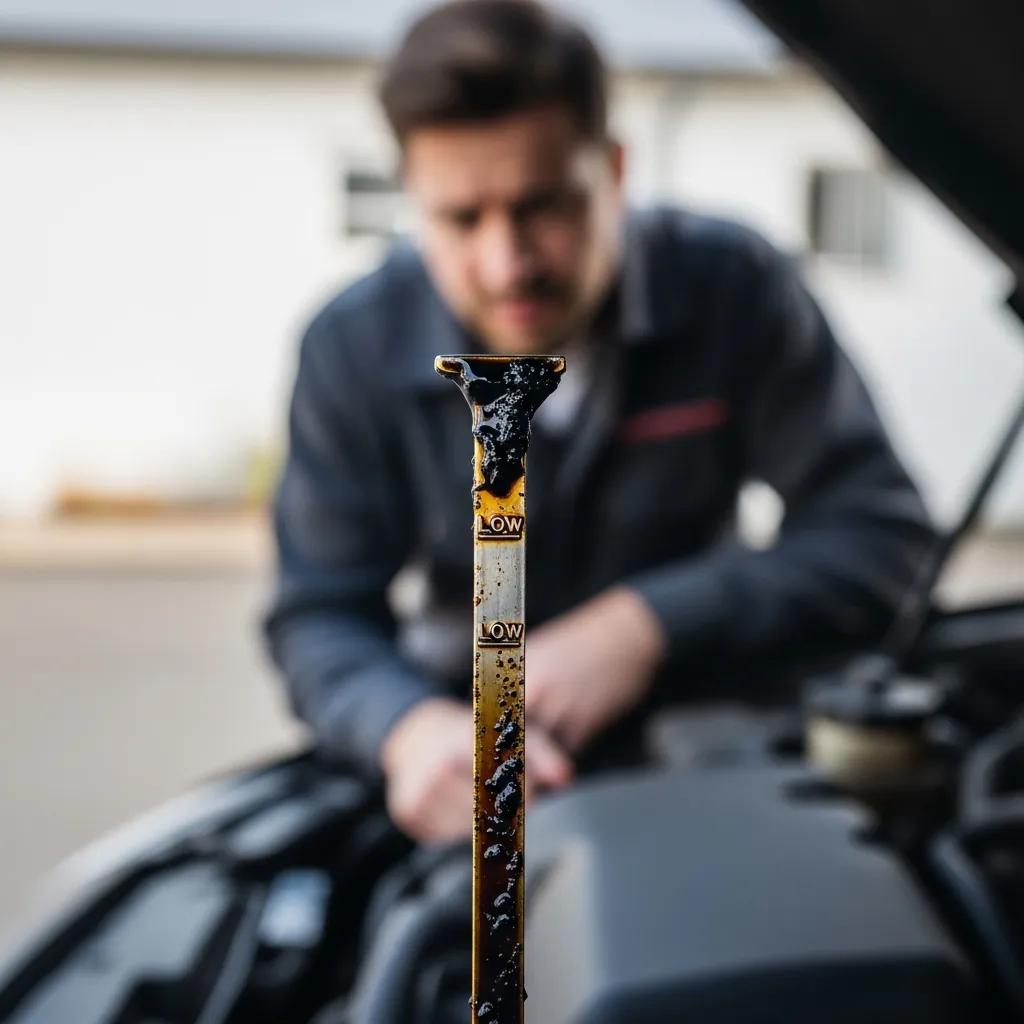
How to assess oil color and consistency
Color and feel tell you whether oil is fresh, degraded, or contaminated. Light amber or golden is normal after a change; darker oil shows soot and oxidation and usually means it’s due for replacement. Milky, creamy oil signals coolant mixing and requires immediate service—internal coolant leaks can cause rapid, serious damage. Regularly noting color and viscosity alongside level gives a maintenance record that helps technicians separate long-term trends from sudden failures.
What to do if oil is low or overfilled
If oil is low, add the correct type in small amounts and recheck—this safely restores lubrication. If oil is overfilled, avoid long drives and correct the excess to prevent mechanical problems. Low oil often comes from leaks, consumption, or missed changes and is typically fixed by topping to the manufacturer-specified grade. Overfilling can cause foaming, higher crankcase pressure, and seal failure, which may lead to smoke, rough running, or leaks. Minor overfills can sometimes be drained to the proper level, but significant overfills or symptoms call for professional help. If you see leaks, suspect coolant contamination, or aren’t sure about the right oil grade, have a shop check it to avoid making things worse.
How to add engine oil safely: types, tools, and procedure
Use the oil grade listed in your owner’s manual (for example, 5W-30 or 0W-20). Use a clean funnel and add slowly, topping in small amounts and rechecking the dipstick after a minute to avoid overfilling. Keep spilled oil off hot engine parts and dispose of containers responsibly. Log the date and amount added to track consumption between services. If you can’t confirm the correct grade or the car is using oil quickly, have a technician inspect for leaks, worn rings, or valve-guide wear.
- Confirm oil grade: Check the owner’s manual for the manufacturer-recommended viscosity.
- Use clean tools: Use a clean funnel and rag to keep debris out of the filler.
- Add in small amounts: Pour a little, wait, and recheck the dipstick before adding more.
These steps lower the chance of overfill and make sure you restore safe lubrication without introducing contaminants.
Why overfilling oil is dangerous and when to call a pro
Overfilling can aerate the oil and create foam, which reduces lubrication and leads to erratic oil pressure—this stresses bearings and seals and can trigger leaks or sensor faults. Excess oil can enter the crankcase ventilation and exhaust systems, producing smoke and fouling catalytic converters or oxygen sensors. If you see smoke, rough idling, or persistent oil-pressure warnings after an overfill, stop driving and have the level corrected and the engine inspected. For significant overfills, contamination, or if overfill happened after a recent service, consult a qualified shop for safe oil removal and a post-service check.
When you need professional help—suspected leaks, milky oil, or major overfill—Prime Time Collision Center provides OEM-quality inspections and repairs, I-CAR Platinum certified technicians, and support with insurance claims to get your vehicle back to safe driving condition.
Common questions about checking engine oil
Below are short answers to the most common questions drivers have about oil checks, frequency, and temperature. Use these quick tips to standardize your routine and avoid common mistakes that cause inaccurate readings or delayed repairs. For post-accident concerns or if you’d rather have a pro verify levels and document issues for insurance, local shops can do a full fluid check.
How often should I check my engine oil?
Monthly checks are a practical baseline for most drivers—they catch slow leaks and gradual consumption early. Always check before long trips. Increase frequency to weekly or biweekly if you tow, drive in extreme climates, or notice higher-than-normal oil use. After a collision, check immediately and again 24–48 hours later because damage may show up as fluids settle. Regular monitoring creates a record that helps technicians tell normal consumption from a mechanical problem.
Should I check oil when the engine is hot or cold?
We recommend checking oil after the engine has been off for 5–10 minutes so warm oil drains back into the pan—this gives a consistent, safe reading. Cold checks (first thing in the morning) are also consistent but may read slightly differently. The most important thing is to be consistent: use the same method each time so trends are meaningful. If you must check immediately after driving, note the temperature when you record the reading since hot readings can be slightly lower or variable.
Prime Time Collision Center offers complimentary post-accident inspections and works with major insurers to document any leaks or contamination found after collisions. If readings are inconsistent or contamination is suspected, consult our certified technicians.
Frequently Asked Questions
What are the signs that my engine oil needs to be changed?
Signs include very dark, thick oil; a milky appearance (possible coolant contamination); metal particles in the oil; the oil-pressure light; or knocking noises from the engine. Regularly checking oil color and texture helps you decide when it’s time for a change to keep the engine running well.
Can I mix different types of engine oil?
Mixing oils isn’t ideal. Different oils use different additive packages that may not work well together. If you must mix, keep it between the same base type (synthetic with synthetic) and the same viscosity, but the best practice is to use the oil type your owner’s manual recommends.
How can I tell if my engine oil is contaminated?
Contaminated oil often looks milky or frothy (a sign of coolant mixing), smells burnt, or contains metal shavings. If you notice any of these signs, have your vehicle inspected right away to prevent further engine damage.
What should I do if I accidentally overfill my engine oil?
Address overfill quickly—minor overfills can be corrected by draining some oil to the proper level. If you notice smoke, rough idling, or warning lights, stop driving and consult a mechanic for safe removal and an engine inspection.
Is it safe to drive with low engine oil levels?
No. Driving with low oil risks severe engine damage. If your oil level is below the minimum mark, add oil immediately or get professional help. Regular checks prevent low-oil situations and keep your engine protected.
How does engine oil viscosity affect performance?
Viscosity determines how the oil flows and protects engine parts. Lower-viscosity oils (like 0W-20) flow better at cold temps and protect during cold starts; higher-viscosity oils (like 10W-40) hold up better at high operating temperatures. Always use the viscosity your owner’s manual recommends for best performance and longevity.
What are the benefits of using synthetic oil over conventional oil?
Synthetic oil offers better temperature stability, improved protection under extreme conditions, and often lasts longer between changes. While it can cost more, synthetic oil can improve engine protection and performance—making it a good choice for many drivers, especially under heavy use.
Conclusion
Checking your engine oil regularly is one of the easiest ways to protect your vehicle and avoid costly repairs. Understand what you’re looking for in both level and condition, make monthly checks a habit, and inspect again after any collision. If you want a professional inspection or help documenting fluids for an insurance claim, bring your car to Prime Time Collision Center—our I-CAR Platinum certified technicians provide thorough, OEM-quality inspections and support to get you back on the road safely.


