


Emergency Braking: Practical Skills and How Your Vehicle’s Systems Help
Emergency braking is the deliberate, maximum-effort use of your brakes to avoid or lessen an imminent crash. Learning these techniques lowers crash risk and keeps people safer inside and outside the vehicle. This guide walks you through proven braking methods, explains how systems like ABS and AEB work, and shows how driver choices and vehicle condition combine to affect stopping performance. When every second counts, reaction time, road grip, and brake health decide the outcome. We cover ABS, threshold, and cadence braking, lay out step-by-step panic-stop procedures, explain skid recovery, and highlight what changes stopping distance so you can adapt to conditions. Finally, we explain why post-collision inspections and OEM-certified brake repairs matter for restoring system integrity and ensuring ADAS recalibration is done right. Continue reading for clear how-to steps, side-by-side comparisons, practice tips, and post-accident repair guidance you can trust.
Core Emergency Braking Techniques Every Driver Should Know
Most emergency braking falls into three categories: ABS braking, threshold braking, and cadence braking. Each works best for certain vehicles and road surfaces. Knowing how wheel-lock prevention, pedal modulation, and controlled releases affect traction helps you pick the right response and keep steering control. Master these methods to shorten stopping distance and keep your car predictable in an emergency. Below we define each technique, explain when to use it, and offer practice tips to build reliable muscle memory.
These braking methods have different mechanics and trade-offs. The table below lays out how they work and when each is most appropriate.
| Technique | How It Works | When to Use |
|---|---|---|
| ABS braking | Rapid pulsed braking controlled by wheel-speed sensors and a hydraulic modulator to prevent wheel lock while keeping steering | Most modern cars with ABS — effective on wet, dry, or mixed traction when you need to stop hard and still steer |
| Threshold braking | Firm, steady pedal pressure held just below the point of wheel lock to maximize deceleration on non-ABS or performance vehicles | Non-ABS cars or track/performance driving on consistent, high-traction surfaces |
| Cadence braking | Short, repeated releases and reapplications of brake pressure to mimic ABS when no ABS is available | Older cars without ABS or when wheels lock and you need to regain traction, especially on variable surfaces |
Choosing the right technique depends on your vehicle and the surface. The sections below break down ABS and threshold braking so you can practice them safely.
How ABS Braking Works — and What You Should Do
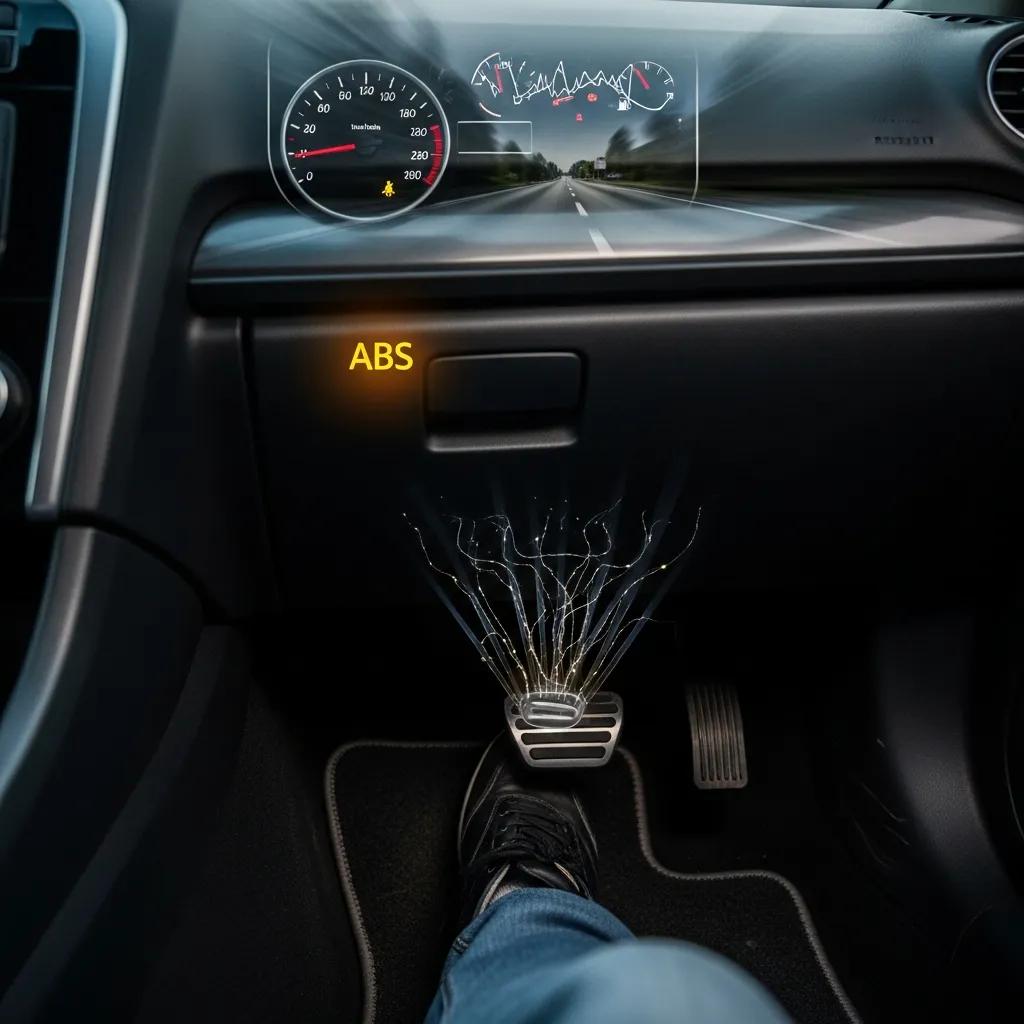
ABS uses wheel-speed sensors, an electronic control unit, and a hydraulic modulator to quickly adjust brake pressure and stop the wheels from locking. That lets you keep steering control while braking hard. When ABS activates, the right response is straightforward: press the pedal firmly, hold it down despite the pulsation, and steer to an escape path — the familiar “stomp, stay, steer.” ABS helps maintain directional control but won’t always shorten stopping distance in every scenario; its main benefit is preventing skids and preserving your ability to steer around danger. After a crash or hard impact, check ABS wheel-speed sensors, wiring, and hydraulic lines — damage can affect system function and usually needs professional diagnostics and calibration.
Trusting ABS takes practice. In a safe, controlled setting or course, perform full emergency stops, feel the pedal pulsation, note how the car steers, and repeat until “hold and steer” becomes automatic. That conditioned response reduces hesitation when real emergencies happen and lets ABS do its job.
What Threshold Braking Is and How to Practice It Safely

Threshold braking means applying the maximum brake force you can without locking the wheels — modulating the pedal to stay just under the lock point. This delivers the strongest deceleration on non-ABS cars or in performance driving. Perform it by steadily increasing pedal pressure while feeling for the first sign of wheel slip; if slip appears, ease pressure slightly to regain traction and hold that steady pressure until the emergency passes. Practice threshold braking only in low-risk, supervised settings and with good tires and brakes — it depends on fine pedal feel. On high-traction surfaces it can match or beat ABS for stopping distance, but it’s hard to control on slick roads where wheel lock and loss of steering are more likely.
Rehearse threshold braking at instructor-led events or closed courses, and keep tires and brakes well maintained so you get the tactile feedback required for precise control. Knowing threshold braking complements ABS awareness and improves overall emergency-stopping ability.
How to Stop Safely in an Emergency
Stopping safely combines the right braking technique with measured steering and situational awareness: either bring the car to a stop in the shortest possible distance or execute a controlled evasive maneuver. The basics are quick recognition, firm and appropriate brake application (ABS: hold; non-ABS: threshold/cadence), and small, deliberate steering inputs to avoid upsetting the car’s balance. Staying calm and following a practiced routine shortens reaction time and works with the vehicle’s dynamics so you’re more likely to avoid a collision. The sections below cover a panic-stop sequence and skid-control responses to help you keep control during extreme braking.
Memorize and practice the simple panic-stop sequence below for both ABS and non-ABS cars.
- Spot the hazard and commit: scan, choose an escape line, and decide to brake immediately.
- Apply firm brake pressure: with ABS, press hard and hold; without ABS, use threshold or cadence braking to avoid lockup.
- Steer to a safe path: use small, purposeful steering inputs to avoid upsetting vehicle stability.
- Keep focus and balance: look where you want to go, keep hands steady, and adjust pedal pressure only if traction changes.
Practice this sequence under supervision so reflexes develop and your response becomes automatic in real situations.
Use the panic-stop checklist alongside these skid-control dos and don’ts to preserve recovery options when you need them most.
- Do keep your eyes on the escape path and steer toward it with small, controlled motions.
- Do ease brake pressure slightly if the wheels lock on a non-ABS car, then reapply to regain traction.
- Do use progressive steering inputs — avoid violent turns that can break grip.
- Don’t over-correct with large, sudden steering moves that can spin the car.
- Don’t slam the clutch in a manual while braking hard; coordinate gears and brakes to keep stability.
- Don’t panic — steady breathing and practiced steps help you regain control.
These quick rules will be expanded in the skid-control section so you can recognize skid types and choose the right recovery action.
Steps for a Proper Panic Stop
A panic stop compresses perception, decision, and action into a short chain: see danger, use the correct braking method, and steer to safety while keeping the vehicle balanced. In ABS vehicles: spot the hazard, push the pedal firmly, hold despite pedal pulsation, and steer to your escape path. In non-ABS cars: apply strong pressure toward the near-lock threshold, modulate if the wheels begin to lock or use cadence braking to regain traction, and steer carefully to the safest lane or shoulder. Rehearse these steps in controlled settings until they become automatic — practice reduces hesitation and shortens reaction time under stress.
After drills, evaluate results: did steering stay effective, did the car track predictably, and did stopping distance match expectations? Regular, low-risk practice builds confidence and reveals tendencies to over- or under-brake so you can correct them.
Keeping Skid Control While Braking Hard
Skid control starts by recognizing wheel slip early — notice steering feel, unexpected yaw, or sideways movement — then respond with proportionate brake modulation and steering into the skid to recover. In a front-wheel skid (car plowing forward), ease brake pressure and steer to re-engage the front tires. In a rear-wheel slide, steer into the slide to align the vehicle and gently reduce brake force as needed. Good tires and functioning ABS give you more recovery margin; worn tires reduce grip and extend recovery time. Regular maintenance and practice recognizing skid cues give you a reliable set of corrective actions to restore control quickly.
Small steering corrections and subtle pedal adjustments are far safer than large, abrupt inputs that can exhaust remaining traction and turn a recoverable slide into a spin.
What Affects Stopping Distance and Vehicle Control?
Stopping distance equals perception-reaction distance plus braking distance, and it changes with speed, reaction time, road surface, tire traction, and brake condition. These factors compound: higher speed increases kinetic energy rapidly, so even a modest speed increase greatly lengthens braking distance. Slippery roads reduce friction and can multiply stopping distance. Driver reaction time — influenced by attention, fatigue, and distraction — adds distance before braking begins. The table below outlines key factors and how they typically affect stopping distance so you can prioritize risk reduction.
| Factor | Attribute | Typical Impact on Stopping Distance |
|---|---|---|
| Speed | Kinetic energy increase | Dramatically increases braking distance; doubling speed more than doubles stopping distance |
| Reaction time | Perception + decision + response | Each 1 second of delay adds distance proportional to speed (e.g., ~44 ft at 30 mph) |
| Road surface | Friction coefficient (wet/ice/gravel) | Wet can double stopping distance; ice multiplies distance by 5+ |
| Tires | Tread depth and compound | Good tires shorten stopping distance and improve modulation; worn tires increase distance |
| Brake condition | Pad, rotor, hydraulic efficiency | Poor brakes reduce deceleration rates and can cause uneven stopping or loss of control |
Knowing how these pieces fit together helps you leave the right space and change your speed for conditions. The practical steps below help reduce stopping distance in everyday driving.
- Increase following distance with speed and in bad weather.
- Keep tires at the manufacturer’s recommended pressure and replace worn tires promptly.
- Have brakes inspected regularly and address signs of fading, pulling, or unusual noises.
- Slow down in low-traction conditions and scan farther ahead to reduce reaction delay.
Improving reaction time and keeping the vehicle ready are two things drivers control directly. The next section explains how scanning and defensive habits shorten reaction distance.
How Road Conditions Change Emergency Braking
Road surface affects the friction between tire and pavement, which changes braking force and lateral grip. Wet roads lengthen stopping distance significantly; snow and ice can multiply it many times. On loose surfaces like gravel, initial traction is inconsistent — use gentler, progressive braking and avoid sudden steering. Painted lines, metal plates, or manhole covers can give almost no traction, requiring immediate modulation. Adjust your technique by easing into the threshold earlier, allowing more time to detect slip, and reducing speed well before hazards. Tire choice and tread depth matter — a properly treaded tire beats a worn one in bad conditions, so proactive tire maintenance lowers your exposure to long stopping distances.
Anticipating traction changes and avoiding abrupt inputs reduces the chance of provoking a skid and preserves recovery options during hard braking.
Why Driver Reaction Time Matters
Reaction time is the delay from seeing a hazard to starting to brake, and that interval directly increases the distance traveled before deceleration begins — especially dangerous at higher speeds. Reaction time includes perception, decision, and physical response; each phase adds measurable distance — for example, at 50 mph, one extra second of reaction equals roughly 73 feet before braking starts. You can reduce reaction time by scanning consistently, cutting in-car distractions, and staying physically ready (hands on wheel, eyes up). Training drills that simulate sudden hazards also shorten your response by building automatic motor patterns and reducing hesitation under stress.
Shortening reaction time is a low-cost, high-impact way to reduce stopping distance, especially when combined with maintenance that keeps brakes performing at their best.
How Automatic Emergency Braking (AEB) Adds a Safety Layer
Automatic Emergency Braking (AEB) uses radar, lidar, or cameras and software to detect imminent collisions and apply the brakes automatically when the driver doesn’t react in time.
AEB helps reduce or avoid rear-end crashes and can often detect pedestrians and cyclists, supplementing human reaction with faster machine response. Its real-world performance depends on sensor coverage, calibration, and tuning — limitations include reduced effectiveness at very high speeds, sensor blind spots, and impaired function when sensors are dirty or misaligned. Studies show AEB lowers certain crash types, but it’s important to remember AEB supplements, not replaces, attentive driving.
- Benefit: Cuts rear-end crashes by adding near-instant automatic braking to human reactions.
- Benefit: Can detect pedestrians or cyclists in many urban scenarios when sensors have clear lines of sight.
- Benefit: Reduces impact speed when full avoidance isn’t possible, lowering injury risk.
- Limitation: Performance drops at very high closing speeds or with small/complex targets.
- Limitation: Sensors can be compromised by dirt, weather, or misalignment after a crash if not recalibrated.
When AEB intervenes, it closes much of the reaction-time gap, but system capabilities vary by manufacturer and scenario, so know your vehicle’s limits and keep sensors clean and aligned.
AEB requires accurate calibration after collisions or body repairs. Proper recalibration restores sensor orientation relative to the vehicle so the system performs as intended. Repair shops with ADAS capabilities and certified technicians can diagnose sensor damage and recalibrate radar and camera units to manufacturer standards.
Benefits and Limits of AEB Systems
AEB lowers crash frequency and severity by braking faster than most drivers can in critical moments. It’s especially effective in low-to-moderate speed rear-end incidents and many urban pedestrian events. Measurable reductions in certain crash types are reported in recent analyses, translating to fewer injuries and less damage when systems work as designed. Limitations remain: reduced effectiveness at high speeds, in poor visibility, or with oddly shaped objects that sensors can’t classify well. False positives and negatives happen, so drivers must stay engaged. After an impact, misaligned mounts or sensor damage can compromise AEB, making post-repair diagnostics and recalibration essential.
How AEB Is Changing Crash Statistics
Research shows vehicles with AEB experience fewer of certain crash types than those without, notably lower rates of low-speed rear-end and urban pedestrian collisions. Improvements vary by sensor quality, algorithm maturity, and real-world conditions, but the overall trend is meaningful: AEB provides an extra safety margin. Still, you can’t rely on AEB alone — keeping sensors clean and ensuring ADAS calibration after repairs preserves the real-world benefits shown in studies.
Seeing AEB as one layer in a broader safety strategy explains why restoring sensor alignment and system function is part of keeping those statistical benefits in your day-to-day driving.
Why OEM-Certified Brake Repair Matters for Safety
OEM-certified brake repair helps restore braking systems and related ADAS components using manufacturer-approved parts, procedures, and calibrations so factory safety standards are met. Using the right parts and following certified processes ensures components like wheel-speed sensors, hydraulic modulators, pads, rotors, and AEB mounts work together as intended — reducing the chance of degraded braking or faulty ADAS behavior. Certification and technician training promote consistent diagnostics and documented repair steps, which is why vehicle owners should choose repair providers that follow OEM guidance. The table below compares OEM parts and certified workflows with non-OEM options to show why certified processes matter for safety and insurance handling.
| Repair Approach | Characteristic | Why It Matters (Safety / Repair) |
|---|---|---|
| OEM parts & procedures | Manufacturer-specified components and calibrated steps | Restores factory tolerances; ensures ABS/AEB sensors and geometry meet original design |
| I-CAR Platinum-certified repairs | Advanced technician training and validated repair sequences | Ensures technicians are trained for ADAS recalibration and structural repair consistency |
| Non-OEM aftermarket alternatives | Variable fit and performance; inconsistent procedures | May compromise sensor alignment, system function, and warranty/insurance claims handling |
Certified repairs lower the risk of compromised braking or ADAS malfunctions — issues that directly affect safety and claims outcomes.
How I-CAR Platinum Certification Protects Braking System Integrity
I-CAR Platinum certification shows a repair facility commits to advanced technician training and validated repair processes that follow manufacturer guidance. That matters for complex systems like ABS modulators and AEB sensors. Certified technicians can spot damage to components — wheel-speed sensors, hydraulic lines, mounts — and follow prescribed replacement, torque, and calibration steps so braking performance and ADAS function meet factory specs. This process control reduces the chance of misaligned sensors or incorrect parts that degrade stopping performance. Vehicle owners benefit from documented repair steps, safer return-to-service, and smoother insurance coordination.
Prime Time Collision Center’s Role in Post-Accident Brake Safety
Prime Time Collision Center in Glendale, CA, provides services to restore braking systems and ADAS function to OEM-quality standards, staffed by I-CAR Platinum-trained technicians and using OEM-aligned repair processes.
- Services that support safe braking after a collision:
- Free repair estimates to evaluate brake and sensor damage.
- Insurance-claims assistance to help coordinate approvals and documentation.
- Emergency 24/7 towing to get vehicles to our facility quickly for inspection and repair.
| Component | Attribute | Safety / Repair Importance |
|---|---|---|
| Free estimate | Initial diagnostic assessment | Identifies brake, sensor, and structural damage early |
| Insurance assistance | Claims coordination | Streamlines approvals for OEM parts and certified repair processes |
| 24/7 towing | Immediate vehicle recovery | Prevents further damage and enables timely diagnostics |
- Choose certified technicians: Proper training reduces the chance of missed ADAS or braking issues.
- Request OEM-compliant parts and procedures: Factory-aligned repairs help preserve system performance.
- Get ADAS and braking diagnostics after any impact: Recalibration and inspection restore automated safety features.
Following these steps helps ensure repairs restore both mechanical braking performance and electronic safety systems so your vehicle returns to service safely.
Frequently Asked Questions
What should I do immediately after an emergency stop?
After an emergency stop, get your vehicle to a safe position if possible and warn other drivers with hazard lights. Check for injuries to yourself and passengers and call emergency services if needed. If you were in a collision, document the scene and exchange information. When it’s safe, inspect your vehicle for visible damage — especially to brakes, wheels, and sensors — and consider having a professional perform a full check.
How can I improve my reaction time for emergency braking?
Improve reaction time by practicing defensive scanning, reducing in-car distractions, and staying physically ready (hands on the wheel, eyes up). Regularly practice emergency braking in a controlled environment to build muscle memory. Defensive driving courses and simulated drills help make your response more instinctive. Good sleep and general fitness also help you react faster under stress.
What maintenance should I perform to ensure my brakes are effective?
Regular maintenance keeps brakes reliable. Check pads and rotors for wear and replace them when needed. Monitor brake fluid level and condition, and inspect lines for leaks or damage. Make sure ABS warning lights are addressed promptly. Because tires strongly influence braking, keep them at the correct pressure and replace worn tires. Schedule periodic inspections with a certified technician to catch issues early.
How does weather affect emergency braking performance?
Weather has a big impact on braking. Rain, snow, and ice reduce tire traction and increase stopping distances. Hydroplaning is a risk in standing water, and icy surfaces can cause sudden loss of grip. Adjust by slowing down, increasing following distance, and using gentle, progressive braking on slippery surfaces. Anticipate hazards earlier so you have more time to react.
What are the signs that my braking system needs attention?
Warning signs include grinding or squeaking noises, a pulsating or vibrating brake pedal, pulling to one side while braking, or a soft/spongy pedal feel. Any ABS warning light should be checked immediately. Address these symptoms promptly — delaying repairs can lead to reduced stopping power and higher risk on the road.
Can I practice emergency braking techniques in my own vehicle?
Yes — but only in a safe, controlled place like an empty parking lot or a closed course. Make sure your vehicle is in good working order before you practice. Focus on feeling the pedal, recognizing ABS pulsation, and rehearsing threshold or cadence techniques as appropriate. Consider professional training for guided feedback and safer, more effective practice.
What role does tire condition play in emergency braking?
Tire condition is crucial. Adequate tread depth and proper inflation give the grip necessary for quick stops and stable steering. Worn or underinflated tires significantly increase stopping distance and reduce control, especially in wet or slippery conditions. Check tire pressure and tread regularly and replace tires when wear affects safety.
Conclusion
Learning emergency braking techniques and keeping your vehicle well maintained makes a real difference in safety. Understanding how ABS, AEB, and basic braking methods interact with driver inputs, road conditions, and vehicle health helps you respond faster and more effectively in critical moments. Prioritize regular practice, proper maintenance, and certified repairs after impacts to keep braking systems and ADAS working as designed. If you’d like help after a collision, Prime Time Collision Center is here to restore your vehicle to OEM standards and get you back on the road safely.


