


The Right Way to Wash Your Car for a Spotless Finish After Collision Repair
Washing a car after bodywork isn’t the same as a routine wash. New paint and clearcoat are still settling, so the goal is to clean without adding scratches, swirl marks, or chemical damage that could affect the repair or warranty. This guide walks you through safe timing, prep checks, the two‑bucket wash, proper drying, and how to choose—and when to apply—wax, sealant, or ceramic options. You’ll get clear, practical steps: when hand‑washing is appropriate, which tools and soaps minimize abrasion, the exact two‑bucket sequence, drying tips to prevent spots, and the trade‑offs between protection types. Follow these steps to keep a repaired finish looking like new.
Why Is Proper Car Washing Crucial After Collision Repair?
New paint and clearcoat need gentle handling while they cure. During that period, harsh chemicals, trapped grit, or aggressive techniques can leave swirl marks, dullness, or even affect OEM repair bonds. Careful hand washing protects appearance, helps maintain resale value, and reduces the chance of warranty or insurance issues. Below are the main reasons to follow post‑repair washing guidance and a quick list of do’s and don’ts.
Because fresh paint remains sensitive for weeks, timing and technique matter—this is why we follow specific washing rules after a repair.
Key things to know about post‑repair washing:
- New paint cures over time and needs gentle cleaning to avoid surface damage.
- Wrong products or rough methods can cause swirl marks, chemical etching, or water spots.
- Correct washing helps preserve OEM repair quality and lowers the chance of warranty disputes.
Observe these precautions to avoid harming a fresh finish, then move on to understanding safe wash timing during the cure process.
How Does New Paint Curing Affect Washing Timing?
Paint cures as solvents evaporate and the clearcoat hardens. Hand washing is usually fine soon after repair if it’s gentle and uses pH‑neutral products, but aggressive polishing or waxing should wait until the clearcoat reaches stable hardness—often 30–60 days depending on the shop’s process and local conditions. Heat and sun can speed surface solvent evaporation but don’t guarantee a complete chemical cure, so err on the side of caution. When unsure, check with your repair shop to match their paint system and any OEM or warranty guidance.
Knowing how cure times work explains why some treatments must be delayed and why careful washing protects OEM‑certified repairs.
What Risks Does Improper Washing Pose to OEM Certified Repairs?
Improper washing can cause both physical and chemical damage that affects the look—and sometimes the integrity—of OEM repairs. Mechanical risks include swirl marks, micro‑scratches from trapped grit, and clearcoat abrasion; chemical risks include etching or stripping from strong alkaline or solvent cleaners. These problems can reveal repair imperfections, reduce gloss, and lead to rework that may conflict with warranty rules if the wrong products or timing were used. Watch for early signs like dull spots, concentrated swirls, or surface etching so you can act before damage spreads.
Recognizing these risks highlights the need for proper preparation before you wash a freshly repaired vehicle.
What Preparations Are Needed for a Spotless Car Wash?
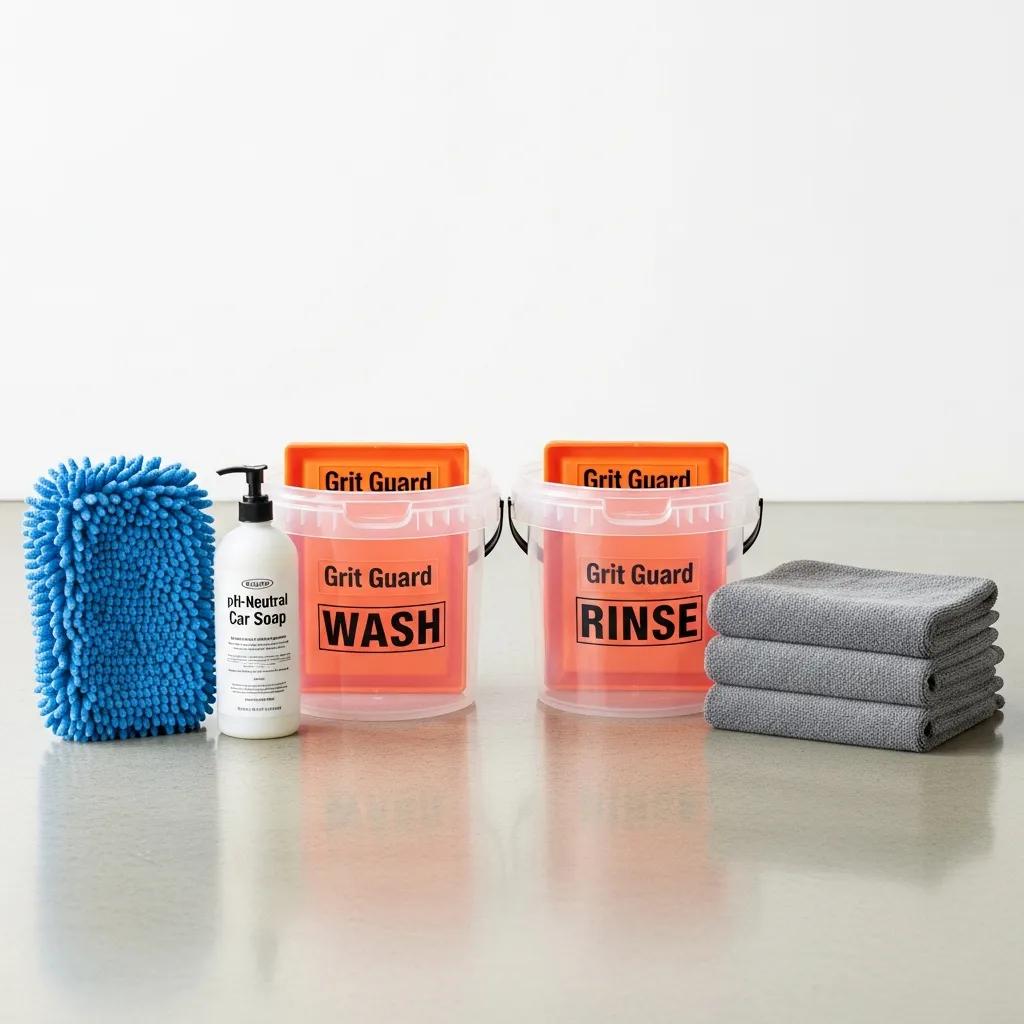
The right prep makes a safe, effective wash possible. Pick a shaded, level spot with low wind and dust. Gather low‑abrasion tools—two buckets with grit guards, a microfiber wash mitt, pH‑neutral soap, a soft wheel brush, and several plush microfiber drying towels. Pre‑rinse to remove loose grit, check repair seams for tape or compound, and follow any shop‑specific do’s and don’ts for newly painted panels. These steps cut cross‑contamination and keep your wash low‑risk.
Recommended basic tool list:
- Two wash buckets with grit guards to separate soapy and rinse water and trap sediment.
- Microfiber wash mitt plus multiple microfiber drying towels to lift contaminants gently.
- pH‑neutral car wash soap and a hose with an adjustable nozzle for controlled rinsing.
These essentials form a safe hand‑wash routine; the table below explains why each tool matters and gives cost ranges for planning.
| Tool | Why it matters | Approx cost |
|---|---|---|
| Microfiber mitt | Lifts contaminants with low abrasion, reducing swirl marks | $10–$30 |
| Grit guard & two buckets | Separates rinse and wash water to prevent grit transfer | $15–$40 |
| pH-neutral car soap | Cleans without stripping coatings or etching clearcoat | $10–$25 |
With supplies gathered, consider local factors like water hardness and airborne dust—these influence drying and spotting, and they help you choose the best wash location.
Which Tools and Supplies Are Best for Washing Repaired Vehicles?
Choose supplies that lower abrasion and chemical stress while making cleaning repeatable. Microfiber mitts lift particles away from paint instead of grinding them across the surface. Use multiple drying towels so you’re not reusing contaminated fabric. A grit guard and second bucket keep sediment out of your wash water. Pick a pH‑neutral soap to avoid stripping sealants or softening the clearcoat. For wheels and rocker panels, use a dedicated brush or separate mitt to avoid cross‑contamination. These choices balance cost and protection for post‑repair care.
Good product choices protect the finish and set you up to pick the right location and timing for the wash.
How Does Choosing the Right Location Enhance Washing Results?
Your wash location affects drying speed, exposure to contaminants, and the risk of mineral spotting. A shaded, flat area reduces rapid soap drying and prevents streaks and mineral rings. Low wind and dust help keep airborne grit off fresh clearcoat. If your water is hard, consider filtered or softened water for the final rinse or keep a pre‑filtered rinse bucket to avoid mineral deposits. Plan washes for cooler parts of the day—morning or late afternoon—to limit UV‑driven drying and keep control of the rinse‑and‑dry sequence.
Picking the right spot improves results and reduces the need for corrective polishing—next is the step‑by‑step two‑bucket method.
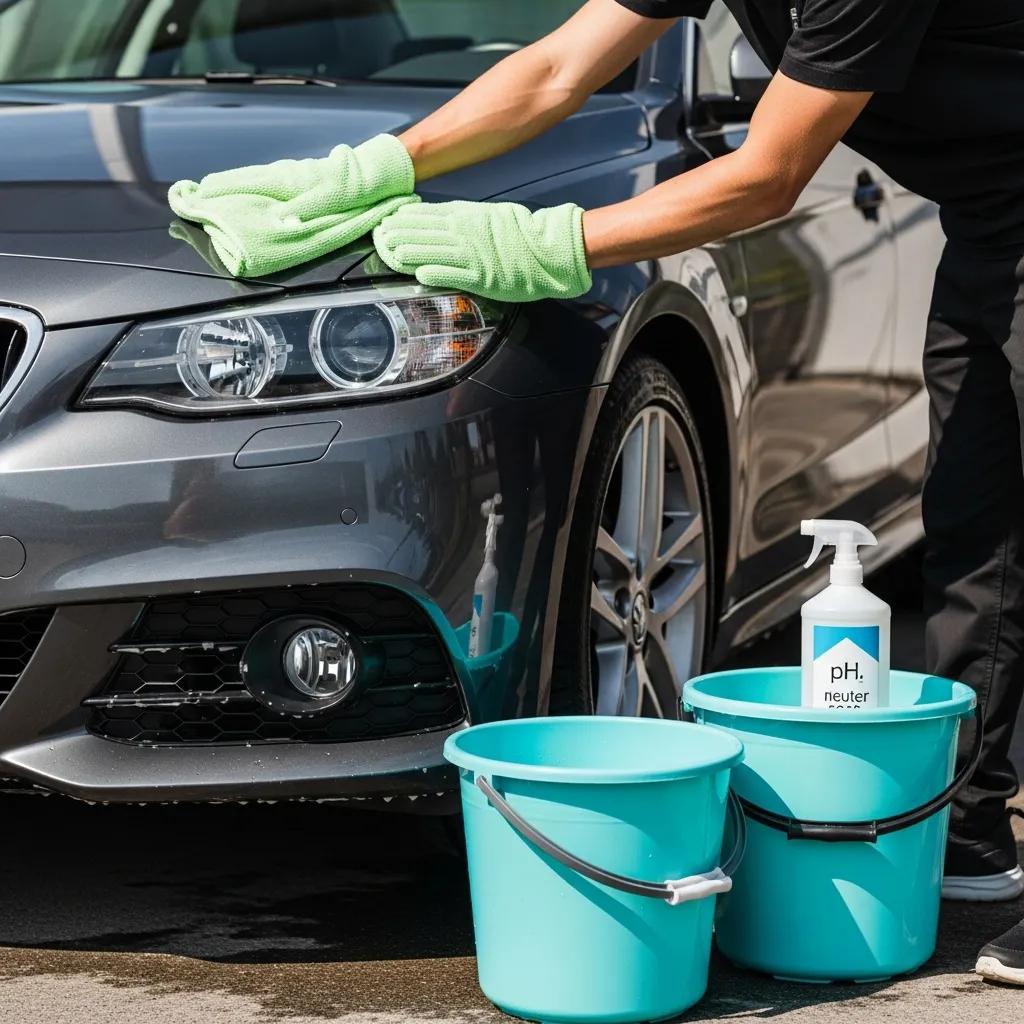
How to Perform the Two-Bucket Method for a Spotless Finish?
The two‑bucket method minimizes abrasion while removing contaminants: one bucket holds soapy water; the other is rinse water. Use grit guards to trap particles. Wash in panels from top to bottom so grit moves away from finished areas, and rinse the mitt often in the rinse bucket. Finish with a thorough rinse and dry immediately to prevent mineral deposits and streaks. This method reduces the mechanical abrasion that causes swirl marks and helps preserve the new paint and clearcoat.
Follow the numbered sequence below for a safe, controlled two‑bucket wash.
Materials and quick safety tip intro: gather materials and follow a panel order to limit cross‑contamination and avoid overworking the paint.
- Fill one bucket with pH‑neutral soapy water and a second with clean rinse water; place grit guards in both.
- Pre‑rinse the car thoroughly to remove loose dirt, starting at the top and working down.
- Soak the microfiber mitt in the soapy bucket, wash one panel using straight‑line strokes, and rinse the mitt in the rinse bucket on each pass.
- Work top‑to‑bottom: roof, hood, trunk, upper sides, then lower panels and wheels last.
- Perform a final rinse from top to bottom, then immediately begin drying with plush microfiber towels using a blot‑and‑pull technique.
Stick to these steps to keep grit out of the wash cycle and protect the fresh finish. The detailed guidance below adds measurements, troubleshooting, and dilution tips.
What Are the Detailed Steps of the Two-Bucket Method?
A measured routine cuts mistakes: mix soap per the manufacturer (often a capful per gallon), rinse the mitt in the clean bucket after each panel, and replace rinse water when it gets visibly dirty. Use straight‑line strokes rather than circular motions to avoid grinding contaminants across the paint. Clean lower, dirtier panels last. If the mitt is overloaded, switch to a fresh one instead of scrubbing harder. Inspect repair seams and trim for trapped residue and rinse them gently so you don’t lift fresh edges.
These specifics prevent common pitfalls and explain why microfiber tools and pH‑neutral soap are the preferred choice.
Why Use Microfiber Tools and pH-Neutral Soap?
Microfiber traps particles in its weave so they don’t abrade the clearcoat, which reduces swirl marks when used correctly. pH‑neutral soaps clean effectively without strong alkalis or solvents that can strip waxes, sealants, or damage curing clearcoat. If your vehicle has a ceramic or factory coating, choose soaps labeled “coating‑safe” to protect hydrophobic properties. Together, microfiber tools and pH‑neutral cleaners give a low‑risk, high‑reward approach for post‑repair exterior care.
With the right tools chosen, the next critical phase is drying the vehicle correctly to avoid water spots and streaks.
How Should You Dry Your Car to Avoid Water Spots and Streaks?

Drying is as important as washing. Minerals and airborne contaminants can bond as droplets evaporate, leaving spots and streaks. Use large, plush microfiber drying towels and a blot‑and‑pull technique instead of vigorous rubbing to avoid abrasion. Change towel faces often and fold towels so you always use a clean section. Work in the shade and start drying immediately after the final rinse. For tight seams and crevices, use a soft detailing brush or compressed‑air alternative to remove water before it dries.
Good drying seals the wash and leads into care for your towels and why you shouldn’t air‑dry a freshly washed repair.
What Are the Best Practices for Using Microfiber Drying Towels?
Use several towels and fold them so clean surfaces are always available. Replace towels when the pile looks worn or contaminated. Wash them separately without fabric softener to preserve loft. Start with blotting to remove most water, then finish with gentle broad strokes using a clean towel section. Larger towels mean fewer passes and less risk of abrasion. Store towels dry and away from garage dust between uses.
Proper towel use reduces the chance of scratching and explains why air‑drying is discouraged.
Why Is Air-Drying Discouraged After Washing?
Air‑drying lets minerals, pollutants, and UV exposure concentrate as water evaporates, forming water spots and potential etching—especially with hard water or direct sun. These mineral rings often need aggressive polishing to remove, which is risky on newly repaired panels. Air‑drying also gives dust and pollen time to settle and bond. Active drying prevents those outcomes and keeps a fresh finish looking its best.
Avoiding air‑drying also makes it easier to plan protection timing after washing.
When and How to Apply Protection After Washing New Paint?
Protective products add gloss and durability, but timing is important—apply too soon and you can trap solvents or interfere with curing. Generally, gentle hand washing is okay early on; polishing or waxing is best delayed 30–60 days depending on the paint system and shop instructions. Choose protection based on durability, maintenance, and budget: paste wax offers quick shine, synthetic sealants last longer, and ceramic coatings give the strongest, longest protection but usually require professional prep and longer cure windows. The table below compares typical protection options to help you decide.
Use this comparison to weigh immediate convenience against long‑term durability when planning post‑repair protection.
| Protection Type | Recommended Wait Time After Repair | Durability | Maintenance Frequency | Approx Cost Range |
|---|---|---|---|---|
| Paste wax | 30–60 days | Short (weeks–months) | Monthly reapplication | $10–$50 |
| Paint sealant | 30–60 days | Medium (6–12 months) | Twice-yearly reapplication | $30–$150 |
| Ceramic coating | 60–90+ days | Long (years) | Annual inspection/maintenance | $200–$1,500+ |
The table shows trade‑offs between quick shine and lasting protection; the next section clarifies safe wait intervals.
How Long Should You Wait Before Applying Wax or Sealant?
Applying polish, wax, or sealant too soon can trap solvents under the protection or interfere with the clearcoat cure. Industry guidance generally recommends waiting at least 30 days for gentle waxes or sealants and up to 90 days for heavy polishing or professional ceramic prep—though exact timing depends on paint chemistry and your repair shop’s instructions. When in doubt, follow the shop’s recommendation. For quick cosmetic refreshes, waterless wash sprays labeled safe for new paint can help without aggressive polishing.
Waiting the proper time reduces the risk of interfering with the repair and helps you choose the right protection method.
What Are the Benefits of Different Paint Protection Methods?
Paste wax gives immediate gloss and is easy for consumers to apply but wears quickly. Synthetic sealants last longer and resist contaminants better. Ceramic coatings provide durable hydrophobic performance, superior chemical resistance, and lower maintenance—but they usually require professional prep and specific cure times. Your choice should balance cost, desired longevity, and how long you can wait after repair. For high‑value finishes, professional ceramic systems offer the best long‑term protection; sealants are a good, practical middle ground.
Understanding these benefits helps decide whether to DIY or schedule professional application and ties into local service options below.
Next, avoid common washing mistakes that damage a fresh repair.
What Common Car Washing Mistakes Should Be Avoided After Repair?
Some routine habits can harm a freshly repaired finish. Avoid automatic brush car washes, household dish soap, washing in direct sun, reusing dirty towels or mitts, and circular scrubbing motions that create swirl marks. These errors speed surface wear, strip protective layers, and produce defects that are hard to reverse. Below are common mistakes and how to mitigate them.
Common mistakes to avoid:
- Using automatic brush‑style car washes — embedded grit in brushes causes abrasion and swirl marks.
- Washing with household detergents like dish soap — these can strip coatings and dry out clearcoat.
- Air‑drying or leaving water to evaporate in direct sun — this leads to mineral spots and etching.
Avoiding these practices preserves the repaired paint and lowers the need for corrective polishing. The table below links bad practices to outcomes and shows practical fixes.
Intro to mitigation table: this table links harmful practices to outcomes and offers actionable steps to prevent or correct the damage.
| Bad Practice | Negative Outcome | Mitigation |
|---|---|---|
| Automatic brush car washes | Swirl marks and micro-scratches | Use hand wash or touchless wash; avoid brushes |
| Harsh/alkaline soaps | Stripping of coatings and etching | Use pH-neutral car wash soap; rinse immediately |
| Circular scrubbing with dirty mitt | Abrasion and visible swirl patterns | Use straight-line strokes and rinse mitt frequently |
Understanding these damage paths helps you adopt safer washing habits and prepares you for inspection and remediation if problems appear.
Why Are Automatic Car Washes and Harsh Soaps Harmful?
Automatic brush washes can trap road grit and metal particles in the brushes; when the brushes contact paint they turn that grit into an abrasive slurry that creates swirls and micro‑scratches. Harsh soaps and household detergents are designed to cut grease and can strip waxes, degrade sealants, and interact with paint binders—leading to dulling or etching. Safer options are gentle hand washing with pH‑neutral soap or touchless washes that use automotive‑safe detergents. Low‑abrasion methods help preserve repaired clearcoat clarity and longevity.
Avoiding these practices reduces the chance you’ll need correction work and leads into how to fix minor swirl marks if they occur.
How Do Improper Techniques Cause Swirl Marks and Scratches?
Swirls and micro‑scratches happen when abrasive particles get trapped between a cleaning tool and the paint and are dragged across the surface. Circular scrubbing, dirty mitts, or single‑bucket methods that reintroduce grit accelerate this damage. Even drying with contaminated towels can add to the problem. Minor swirls can often be improved with a low‑abrasion polish by a professional detailer—aggressive compounding risks removing too much clearcoat. Regular inspection and the washing methods here help prevent swirl formation and keep OEM repair finishes looking right.
When you need guidance on next steps, local pros can give tailored advice for post‑repair maintenance or correction.
For questions about post‑repair washing, timing for protective products, or specific care for your vehicle, Prime Time Collision Center in Glendale, CA can help. Our technicians are I‑CAR Platinum certified and we provide post‑repair care recommendations to protect finish integrity and warranty conditions. Contacting us can clarify shop‑specific cure times and the protection options we recommend. We serve Glendale, Burbank, Pasadena, and greater Los Angeles, so we can advise based on local sun and dust conditions when you schedule follow‑up care.
Call our location at (818) 396-4997 or visit us at 6010 San Fernando Rd, Glendale, CA 91202 to ask about post‑repair care, free estimates, or professional protection applications once you’ve completed the washing steps above.
Frequently Asked Questions
What is the best time of day to wash my car after a collision repair?
Wash in the cooler parts of the day—early morning or late afternoon—and work in the shade when possible. Cooler temperatures and shade slow soap drying and reduce the risk of streaks, mineral deposits, and UV‑driven effects on a curing finish.
Can I use a pressure washer to rinse my car after washing?
A pressure washer can work for rinsing but use it carefully. Keep the nozzle at least 2–3 feet from the surface and use a wide spray pattern. High pressure too close to the paint can damage clearcoat or lifted edges—always follow safe distance and pressure recommendations.
How often should I wash my car after a collision repair?
We recommend washing every two weeks during the first few months while the new paint finishes curing. Regular cleaning removes contaminants that can bond to the surface, but always use the gentle techniques in this guide and confirm any shop‑specific advice.
What should I do if I notice swirl marks after washing?
Address swirl marks early. Minor swirls are often improved with a low‑abrasion polish from a professional detailer. Avoid heavy compounding on repaired panels without shop approval, as it can thin the clearcoat. If swirls persist, consult your repair shop for the best corrective approach.
Is it safe to use detailing sprays on freshly painted surfaces?
Detailing sprays labeled safe for new paint are usually fine for light touch‑ups, but always check the product label. If you’re unsure, wait until the recommended cure time has passed or ask your repair technician for a product recommendation.
What are the signs that my car needs a professional detailing after repair?
Look for visible swirl marks, dull or uneven gloss, rough‑feeling paint, or contaminants that won’t come off with a proper wash. If simple cleaning doesn’t restore the surface, a professional detailer can assess whether polishing or more extensive correction is needed.
Conclusion
Protecting a freshly repaired finish starts with the right wash: gentle products, correct technique, and careful timing. Follow the two‑bucket method, dry immediately with clean microfiber towels, and wait the recommended time before polishing or applying long‑term protection. If you need help or prefer a professional touch, contact local experts who understand post‑repair care. Small steps now will keep your vehicle looking its best and safeguard the quality of the repair.


