


Complete Guide to Auto Body Repair: What Every Car Owner in Glendale Should Know
Complete Guide to Auto Body Repair in Glendale: Clear Steps and Practical Advice for Car Owners
Auto body repair isn’t just about making your car look right again — it’s about restoring safety, structure, and reliable operation after a collision. This guide walks Glendale drivers through each stage of the repair journey: how damage is evaluated, why OEM-certified repairs matter, how to handle insurance, what local services can help, and how modern systems like ADAS and EV components affect repairs. We know accidents bring uncertainty — hidden damage and insurance back-and-forth can slow things down. Our goal is to give you straightforward explanations, useful checklists, and concrete next steps so you can make confident decisions. From the first free estimate through disassembly, structural repair, parts and paint, reassembly, and final quality checks, we explain what to expect and why certified processes protect your safety and warranty. Read on for step-by-step procedures, comparison notes, insurance tips, local services for Glendale drivers, and practical details about modern vehicle systems.
What Are the Key Steps in the Auto Body Repair Process?
Collision repairs follow a clear workflow that moves a vehicle from initial inspection back to safe, road-ready condition. Each phase focuses on a different goal: discover damage, repair structure, restore systems, and confirm final performance. First, we do a visual and diagnostic damage assessment and provide a free estimate. Disassembly follows to uncover hidden issues that can change the plan. Structural and frame work correct alignment and crash-energy paths. Parts sourcing and refinishing restore fit, finish, and corrosion protection. Reassembly and system recalibration (including ADAS) make sure everything works together. Finally, a full quality-control check and customer handoff wrap up the job. Knowing these stages helps you expect timelines, possible supplements, and where insurer approvals fit in. Below we expand on assessment and disassembly so you know what technicians look for and how supplements are handled.
Quick reference — the primary repair stages:
- Damage assessment and free estimate documenting visible and likely hidden damage.
- Disassembly and hidden-damage detection to reveal structural or electronic issues.
- Structural/frame repair and alignment to restore safety-critical geometry.
- Parts sourcing (OEM when specified) and paint/refinishing for proper fit and appearance.
- Reassembly, system recalibration (including ADAS), and road testing.
- Final quality control inspection and customer handoff with documentation.
That sequence sets clear expectations for typical timelines and customer touchpoints so you can plan rentals, communications with your insurer, and vehicle availability.
Below is a short table summarizing stages, what happens, and typical timeframes to help with planning.
| Repair Stage | What Happens | Time / Outcome / Customer Action |
|---|---|---|
| Initial Assessment & Estimate | Visual inspection, diagnostic scans, estimate prepared | 1–3 days; review estimate and authorize work |
| Disassembly & Hidden Damage Detection | Remove panels, inspect structure and electronics | 1–5 days; supplements may be identified and submitted |
| Structural/Frame Repair | Straighten frame, repair or replace structural parts | 1–7 days; restores OEM alignment and crash paths |
| Parts Ordering & Paint | Order parts (OEM when specified), paint and refinish | 3–10 days depending on part availability |
| Reassembly & Calibration | Reinstall components, calibrate ADAS, functional checks | 1–3 days; road test and system verification |
| Final QC & Delivery | Comprehensive inspection and paperwork | 1 day; receive repair summary and warranty info |
Use this as a baseline — individual jobs vary, but this shows typical outcomes so you can plan next steps.
How Is Initial Damage Assessment and Free Estimation Conducted?
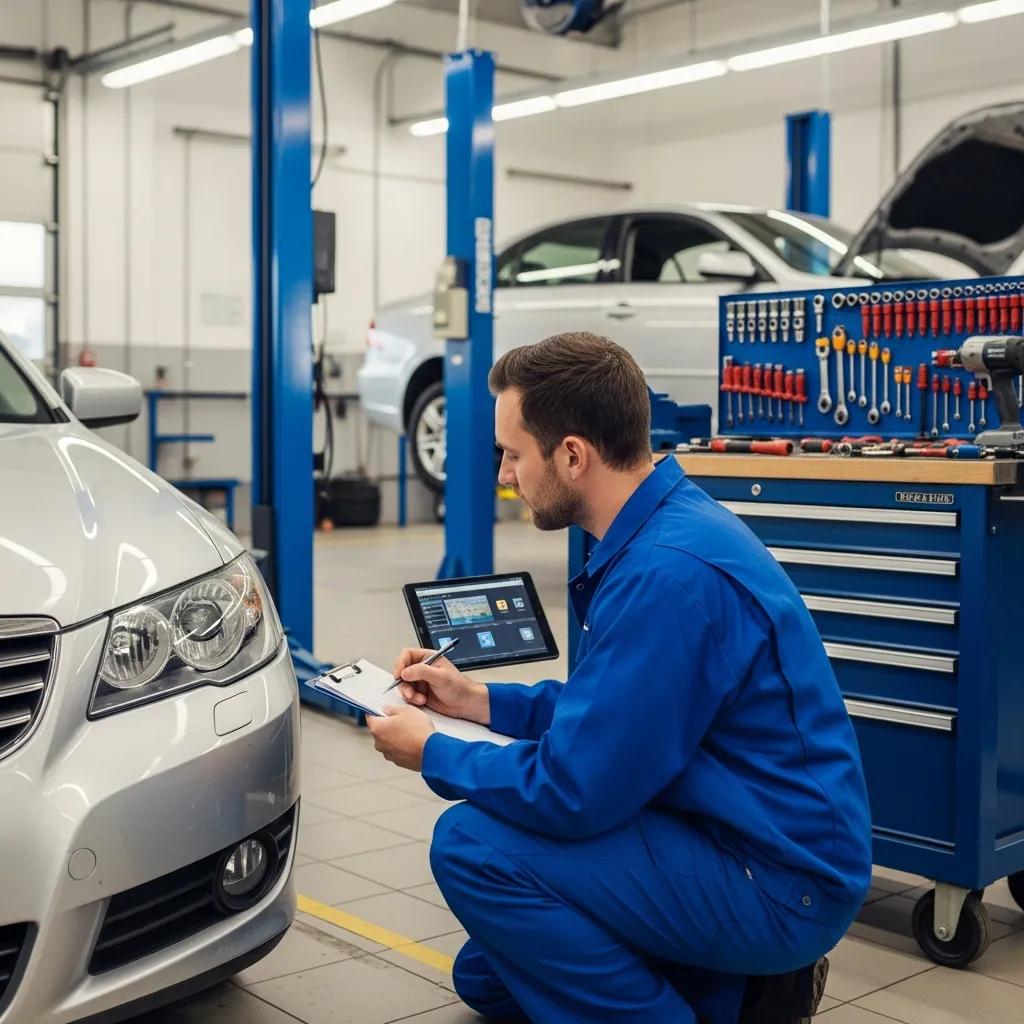
The initial assessment combines a walkaround with targeted diagnostics to estimate repair scope, cost, and likely hidden damage. Our technicians photograph visible damage, check panel gaps and alignment, run diagnostic scans for fault codes, and inspect ADAS sensor locations. The free estimate breaks out parts, labor, paint, and any expected sublet work, and usually includes a provisional timeline. Bringing your own photos and the accident report (if available) speeds the process. Technicians will explain common supplement triggers — rust, previously unseen frame bends, or sensor damage — that can extend time and cost. Clear documentation at this stage helps the shop and your insurer reach agreement more quickly and reduces surprises later.
New tools, including AI-assisted inspection aids, are being explored to improve damage detection and estimate accuracy.
AI for Vehicle Damage Detection
A systematic review of AI applications in vehicle damage detection highlights how machine learning can help identify and classify damage, improving inspection consistency and supporting faster estimates.
Vehicle Damage Detection Using Artificial Intelligence: A Systematic Literature Review, MJ Hasan, 2025
Technician checklist for a reliable free estimate:
- Photos and notes documenting exterior damage and measured gap or fit issues.
- Diagnostic scan for airbag/ECU fault codes and ADAS sensor status.
- Structural appraisal for visible alignment shifts or suspected frame damage.
- Initial parts list (OEM if specified) and labor estimate with a provisional timeline.
These steps reduce uncertainty and set realistic expectations before we move into controlled disassembly to confirm or revise the estimate.
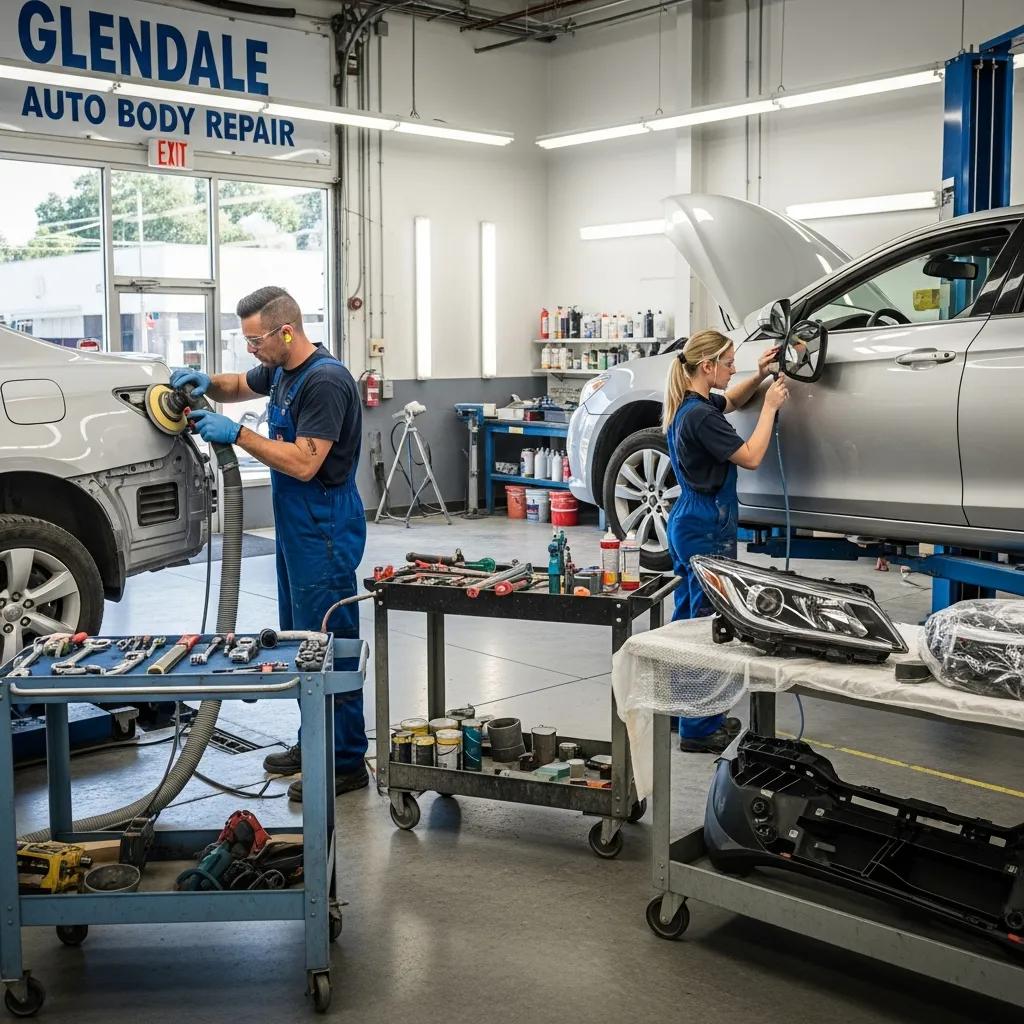
What Happens During Disassembly and Hidden Damage Detection?
Disassembly means carefully removing damaged panels and trim to expose any hidden structural, mechanical, or electronic problems that the initial inspection couldn’t show. Pulling bumpers, fenders, and interior covers often reveals bent subframes, compromised crash rails, torn mounting points, or shifted ADAS sensors that require additional work. Shops document findings with photos and supplemental estimates, then submit those supplements to insurers for approval. Using diagnostic tools, frame-measurement systems, and alignment equipment, technicians quantify damage and determine whether straightening or part replacement is required. Because concealed damage can change timelines and cost, expect clear updates and revised completion estimates at this stage.
Disassembly directly informs structural repair plans and parts ordering so the repair restores safety and function, not just appearance.
Why Is OEM Certified Collision Repair Crucial for Your Vehicle’s Safety?

OEM-certified repairs follow manufacturer procedures, use approved parts and calibrated tools, and protect the vehicle’s designed crash performance. That matters because manufacturer directions include specific steps, torque specs, welding methods, and software updates that keep safety systems working as intended. OEM parts retain original fit, material properties, and compatibility with sensors and electronics. Choosing OEM-certified repair helps preserve your warranty and reduces the risk of long-term issues that can come from ill-fitting aftermarket parts. Below we explain I-CAR Platinum certification and how OEM protocols translate to factory-quality repairs so you can prioritize safety-focused choices.
Primary benefits of OEM-certified repair:
- Safety preservation: Correct materials and procedures maintain crash energy management.
- Fit and performance: OEM parts match vehicle specifications for reliable operation.
- Warranty and resale: Following OEM guidance reduces warranty disputes and supports resale value.
Quick comparison: OEM vs aftermarket impacts for common part types.
| Part Type | OEM vs Aftermarket | Safety / Compatibility / Warranty Impact |
|---|---|---|
| Structural Panels | OEM matches original metallurgy and fit | Higher integrity, fewer fit issues, preserves crash performance |
| Mechanical Components | OEM manufactured to spec | Maintains performance and durability; reduces failure risk |
| Sensors & Electronics | OEM includes calibration references | Ensures ADAS interoperability and accurate diagnostics |
| Cosmetic Panels | Aftermarket may require modification | Potential misalignment and paint mismatch; limited warranty effects |
Choosing OEM parts and following manufacturer procedures minimizes safety risks and long-term surprises.
What Does I-CAR Platinum Certification Mean for Repair Quality?
I-CAR Platinum is a widely recognized standard showing a repair facility keeps technicians trained across roles and up to date on modern repair methods. Platinum-level training covers structural repair, welding, ADAS systems, and manufacturer procedures — all the skills needed for complex repairs. Technicians with this training follow OEM repair sequences more accurately and are less likely to make mistakes that could affect occupant protection later. You can verify a shop’s status by asking for their current I-CAR documentation and records of technician training before you authorize repairs.
Platinum-trained teams are better equipped for advanced systems and complicated repairs — which ties directly into how OEM certifications deliver factory-quality results.
How Do OEM Certifications Ensure Factory-Quality Repairs?
OEM certification asks shops to follow manufacturer repair procedures, use specified tools and calibration equipment, and source approved parts or approved alternatives. Certified workflows include documented steps for structural fixes, prescribed welding methods, software updates, torque specs, and ADAS recalibration where needed. Shops that follow these procedures keep records of replaced parts, calibration reports, and test results — which help with transparency and any future warranty claims.
Following OEM guidance lowers long-term risk and is a major factor when choosing where to have safety-critical repairs done.
How Can You Navigate Insurance Claims for Auto Body Repair in Glendale?
Handling an insurance claim well comes down to organized documentation, clear communication with both your insurer and the repair shop, and knowing your right to choose the shop. The basic flow is: report the claim, get a free estimate, schedule an adjuster if needed, authorize repairs once approved, and track supplements if hidden damage appears. Repair shops support the process by documenting damage, submitting supplements, and communicating with adjusters. Accurate paperwork and timely photos speed approvals and reduce disputes. Below we map the typical claim steps and the shop’s role so you can anticipate interactions and responsibilities.
Claim steps and how the shop helps:
| Claim Step | Shop Role | Customer Tip / Expected Outcome |
|---|---|---|
| File claim with insurer | Provide documentation and initial estimate | Report promptly and schedule a free estimate |
| Adjuster inspection | Coordinate inspection and provide photos | Attend if possible; keep records of communications |
| Repair authorization | Submit estimate and supplements as needed | Approve work once scope is clear to avoid delays |
| Repair completion & payment | Provide final invoice and warranty documentation | Verify repairs and request documentation for your records |
This layout clarifies what to expect at each phase and shows how the shop supports your claim by keeping clear records.
What Is the Step-by-Step Insurance Claim Process?
After an accident, start by ensuring everyone is safe, photograph the scene, contact police if required, and notify your insurer to open a claim. Next, get a free estimate from a reputable repair shop and schedule an adjuster inspection if your carrier wants one — bring photos and damage notes to speed things along. Once the adjuster and shop agree on scope, the insurer issues authorization. During repairs, the shop will submit supplements for any hidden damage found during disassembly and wait for approvals to continue. After repairs finish, your final payment is processed according to policy, the shop completes QC checks and any ADAS calibration, and you receive warranty documentation and the final inspection report.
Practical steps to keep things moving:
- Ensure safety, photograph the scene, and collect witness/contact info.
- Notify your insurer, get a claim number, then obtain a free repair estimate.
- Coordinate the adjuster inspection and authorize repairs once scope is agreed.
- Monitor supplements during disassembly and approve necessary additional work.
- Complete repairs, verify ADAS calibration and alignment, and obtain warranty documentation.
Following these steps helps reduce delays and keeps your repair choice and quality under your control.
How Does Prime Time Collision Work with All Major Insurance Companies?
Prime Time Collision Center works directly with insurance adjusters to provide clear documentation, submit initial estimates and supplements, and keep both customers and insurers updated during repairs. Our process emphasizes accurate photos, diagnostic reports, and documented repair procedures to reduce back-and-forth and speed approvals while staying transparent with vehicle owners. You have the right to pick your repair shop — Prime Time Collision aims to be the OEM-quality choice that simplifies claim resolution by coordinating with major carriers. If you need help with a claim, call us at (818) 396-4997 to discuss estimate submission, adjuster coordination, and support through every step.
Next, we cover the local services we offer Glendale drivers after an accident.
What Local Services Does Prime Time Collision Center Offer to Glendale Residents?
Prime Time Collision Center offers services designed to make recovery from an accident easier: free estimates, 24/7 towing, OEM-quality repairs, ADAS calibration, EV repair capability, and a lifetime workmanship warranty. These services help you move from incident to repair faster, limit downtime, and ensure your vehicle meets safety and appearance expectations. We also assist with insurer communication and provide clear repair timelines so Glendale customers can manage logistics with confidence. Below we describe towing support and common local scenarios to show how our services work in practice.
Key local services we provide:
- Free estimates that document damage and support insurance claims.
- 24/7 towing to safely recover disabled vehicles and preserve claim evidence.
- OEM-quality repair processes, ADAS calibration, and EV repair handling.
- Lifetime warranty on workmanship to give long-term peace of mind.
These offerings reduce post-accident stress and help you get back on the road safely.
How Does 24/7 Towing Support Help After an Accident?
Round-the-clock towing gets disabled or unsafe vehicles off the road quickly, prevents further damage or theft, and preserves evidence for insurance purposes. Towing a vehicle to a certified repair facility lets technicians start initial assessments sooner and schedule diagnostics or disassembly without delay. When tow records and shop intake notes are included in the claim file, they help establish accurate damage timelines and cost assessments. For drivers stranded in unsafe locations or with non-drivable cars, 24/7 towing speeds the transition into the repair workflow and reduces additional risk.
Quick towing shortens the gap between accident and repair start, which improves documentation and helps avoid secondary damage that complicates claims.
What Are Common Accident Scenarios in Glendale and How Are They Handled?
In Glendale we often see low-speed parking lot bumps, rear-end collisions on surface streets, and higher-speed freeway incidents. Each has typical damage patterns and repair paths. Parking lot bumps usually affect bumper covers, light assemblies, or brackets — but disassembly is still important to check for sensor or mounting damage. Rear-end collisions can push components forward, trigger seatbelt or airbag checks, and require trunk or tail structure alignment. Freeway crashes may cause structural damage needing frame straightening, major assembly replacement, and coordinated ADAS recalibration. Immediate steps after any crash are: document the scene, get a free estimate, and preserve vehicle systems for accurate diagnostics.
Recommended immediate actions by scenario:
- Parking lot bumps: photograph the damage, check for fluid leaks, and schedule a free estimate.
- Rear-end collisions: inspect for airbag deployment, trunk integrity, and structural misalignment.
- Freeway incidents: prioritize safety, tow to a repair facility, and request a comprehensive structural inspection.
These scenario-specific tips help you understand likely repair complexity and set realistic expectations for parts, labor, and potential supplements.
How Are Advanced Vehicle Technologies Like ADAS and EVs Repaired?
Today’s vehicles rely more on Advanced Driver Assistance Systems (ADAS) and electric powertrains, and those systems require specialized diagnostics, calibration tools, and safety procedures during collision repair. ADAS parts — cameras, radar, ultrasonic sensors — must be located, inspected, and often recalibrated after body or windshield work so lane-keeping, adaptive cruise, and collision warnings work correctly. Electric vehicles require strict high-voltage isolation, battery inspections, and OEM-recommended handling of battery modules and charging hardware to prevent hazards and protect system integrity. Certified equipment and trained technicians are essential for accurate calibration and safe EV service, so choose a shop that invests in those capabilities to restore your vehicle to factory performance.
The next sections explain ADAS calibration and EV-specific repair practices and why certified steps matter for safety.
What Is ADAS Calibration and Why Is It Important?
ADAS calibration aligns and programs sensors and cameras so driver assistance features work within manufacturer tolerances. Proper calibration restores systems like lane assist, automatic emergency braking, and adaptive cruise control. Calibration can be static (using targets in the shop) or dynamic (on the road with diagnostic tools); the method depends on the vehicle and which components were replaced or moved. Skipping or doing poor calibration can produce inaccurate sensor readings, reduced system performance, or warning lights that compromise safety. Verification after calibration includes functional tests, diagnostic scans, and documented records showing the system meets OEM requirements.
Industry experts agree: ADAS recalibration is a necessary, safety-critical step on modern repairs.
ADAS Sensor Recalibration in Collision Repair
Recalibration of ADAS sensors is now a required part of many collision and mechanical repairs to ensure driver-assist features perform correctly after service.
Unsettled Issues on Sensor Calibration for Automotive Aftermarket Advanced Driver-Assistance Systems, 2021
Proper ADAS calibration ties the visible repair work to the vehicle’s electronic safety systems and should be documented in the final quality-control report.
How Does Prime Time Collision Handle Electric Vehicle Repairs?
At Prime Time Collision Center we follow strict high-voltage safety protocols and OEM procedures when servicing electric vehicles. That includes battery isolation, diagnostic checks, and sourcing EV parts according to manufacturer guidance. Technicians trained in EV safety use insulated tools and follow shutdown/isolation sequences to prevent accidental energy discharge. Diagnostic checks include battery state-of-health checks and system fault analysis before and after repairs. EV-specific parts and software updates are handled per OEM directions to keep systems compatible and warranties intact. If you own an EV, confirm the repair facility follows manufacturer procedures and has trained technicians for safe, reliable repairs.
Preventing electrical hazards during EV service depends on strict adherence to high-voltage disconnection and safety protocols.
Safe EV Repair: Disconnecting High-Voltage Power
Guidance on safe working procedures for EV maintenance emphasizes disabling and isolating high-voltage sources before any service to protect technicians and vehicle systems.
Safe Working Procedures for Electric Vehicle Maintenance, P Colella, 2025
These EV procedures reinforce the value of certified repair practices and lead naturally into warranty and quality-assurance expectations.
What Warranty and Quality Assurance Can You Expect from Prime Time Collision?
Warranty coverage and thorough quality control give you peace of mind after repair. Prime Time Collision Center offers a lifetime workmanship warranty per our service terms — shops that offer this typically cover their work for as long as you own the vehicle, subject to stated conditions.
Our quality-control workflow includes staged inspections: structural verification, alignment checks, paint-match review, ADAS recalibration confirmation, and road testing. Warranty service usually begins with an inspection to verify the issue and the original repair scope, followed by corrective work when the problem falls under coverage. Ask for written warranty terms and QC records so you understand coverage limits and the process for filing a warranty claim.
What Does the Lifetime Warranty Cover?
A lifetime warranty typically covers workmanship on repairs performed by the shop — things like panel fit, paint adhesion, or structural work that fails due to how it was performed rather than normal wear. Parts themselves may carry separate manufacturer warranties. Shops normally explain the difference between workmanship coverage and parts warranties when they give you documentation. For warranty claims, the shop will inspect the vehicle, document the issue, and perform corrective repairs under the warranty if the problem is covered. Ask for written warranty details before repairs so expectations are clear.
Confirming exact warranty terms with the facility upfront helps streamline any future warranty work.
How Does Quality Control Ensure Your Vehicle’s Safety and Appearance?
Quality control at a collision facility is a series of checkpoints that confirm structural alignment, mechanical function, paint match, and electronic system operation before delivery. Typical QC steps include frame alignment verification, torque and weld checks, diagnostic scans for fault codes, ADAS recalibration confirmation with test records, and paint evaluation under varied lighting for match and finish.
QC documentation — photos, alignment reports, and calibration logs — creates a paper trail that supports warranty claims and shows repair work met required standards. The final customer handoff usually includes a walk-through where technicians explain the repairs, show QC documentation, and review warranty coverage and any recommended post-repair care.
These QC steps close the loop on repairs and give you confidence that both safety systems and appearance have been properly restored.
- Next step: For Glendale drivers ready to start a repair or file a claim, contact Prime Time Collision Center at (818) 396-4997 to schedule a free estimate and talk through insurance coordination.
- Documentation tip: Keep photos and records from the accident to support estimate accuracy and any supplement approvals.
- Quality tip: Ask for written warranty and calibration documentation before you pick up the vehicle.
These practical steps move you from understanding to action while protecting safety, warranty rights, and clear communication during the repair.
Frequently Asked Questions
What should I do immediately after an accident?
First, make sure everyone is safe and move to a safe spot if you can. Take photos of the scene, the vehicles, and damage. Exchange information with the other driver and collect witness details. Call the police if required, and report the incident to your insurer to open a claim. These steps preserve evidence and make the claim process smoother.
How can I choose the right auto body repair shop?
Look for shops with solid customer reviews, certifications like I-CAR Platinum, and a clear commitment to OEM repair methods. Ask whether they have experience with your vehicle make and any advanced systems like ADAS or EV components. Confirm warranty terms and ask how they communicate with insurers. Visiting the shop for an estimate is a good way to judge professionalism and service level.
What are the signs of hidden damage after a collision?
Signs include misaligned panels, strange noises while driving, dashboard warning lights, uneven tire wear, pulling to one side, or fluid leaks. If handling feels off or you notice vibrations, get a professional inspection — hidden damage can affect safety and performance.
How long does the auto body repair process typically take?
Repair time depends on damage severity. Minor work can take a few days; structural repairs or parts backorders can stretch the job to several weeks. Parts availability, repair complexity, and shop workload all affect timing. Ask your repair facility for a timeline specific to your vehicle and damage.
What should I expect during the final quality control inspection?
Expect a full review of the repairs: structural alignment checks, paint-match evaluation, diagnostic scans, ADAS recalibration verification, and a road test. You should receive documentation of QC results, which is useful for warranty records and future reference.
Are aftermarket parts safe to use in repairs?
Aftermarket parts can be cost-effective, but quality varies. OEM parts are designed for your vehicle and usually offer better fit, compatibility, and safety for critical components. If aftermarket parts are proposed, ask about certification and how they affect warranty and long-term performance.
What is the importance of ADAS calibration after repairs?
ADAS calibration is essential to ensure driver-assist features like lane-keeping and automatic braking work correctly. Incorrect or skipped calibration can cause inaccurate sensor readings and impaired system performance, which is a safety risk. Proper calibration — static or dynamic, depending on the vehicle — must be documented as part of the repair.
Conclusion
Knowing the auto body repair process helps Glendale drivers make smart choices after an accident. Prioritize shops that follow OEM procedures, keep communication open, and document repairs clearly. Local services like free estimates and 24/7 towing make the process easier and faster. If you’d like personalized help, call Prime Time Collision Center to schedule a free estimate and discuss your repair needs.


