


Post-Repair Car Care: A Practical Guide to Protecting Your Vehicle, Finish, and Warranty
Taking the right steps after collision repairs keeps your vehicle safe, preserves the finish, and helps protect any workmanship warranties. This guide lays out clear timelines, inspection steps, and a maintenance plan for paint care, protective products, mechanical checks, and insurance follow-up. Fresh paint and replacement parts need time to cure, settle, and be calibrated — and those processes affect corrosion resistance, appearance, and crash performance. Read on for safe washing and waxing practices, an inspection checklist, the advantages of OEM-certified repairs, a recommended service cadence, and practical advice for warranties and claims. We’ll also note when to contact a qualified collision center for reinspection or help with claims.
How Long Should You Wait to Wash Your Car After Auto Body Repair?
Letting paint cure before you wash it reduces the chance of trapping solvents or damaging the finish. For most modern basecoat/clearcoat systems, a general guideline is to wait 30–60 days before regular washing and waxing. Solvents need time to evaporate and the clearcoat needs to chemically harden; washing too soon can lift or dull a soft clearcoat, trap moisture, or embed abrasives in paint that hasn’t fully set. Always follow the repair shop’s specific guidance for your vehicle’s paint system and local conditions — high humidity or cooler temperatures can lengthen cure time, while very warm, dry weather can speed it up.
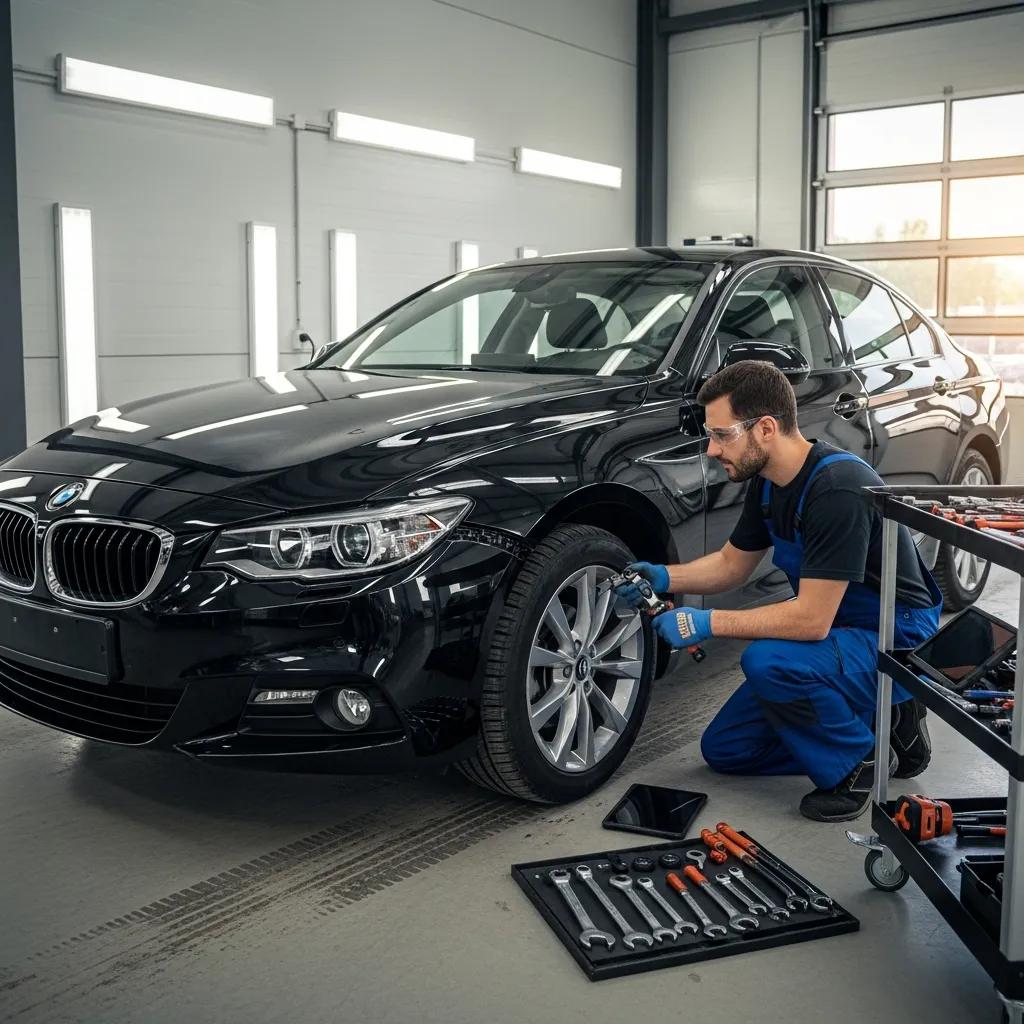
Our team at Prime Time Collision Center — I‑CAR Platinum certified and trained to factory standards — can provide a vehicle-specific paint cure window and post-repair care instructions. If we used factory-matching paint or clearcoat on your vehicle, ask for the recommended wait time and any interim spot-care tips. We’ll also document those instructions for your warranty records so you don’t accidentally void workmanship protections.
What Is the Paint Curing Process and Why Is It Important?
Paint curing is the combination of solvent evaporation and chemical cross-linking that turns basecoat and clearcoat into a hard, protective finish. How quickly a finish resists scratches, chemicals, and weather depends on that curing process, which can take weeks to months depending on paint chemistry and conditions. Early in the cure the surface is softer — like glue that needs time to harden — so aggressive cleaning or polishing can damage the finish. That’s why gentle spot-cleaning is safer during the first 30–60 days and why final protective treatments should wait until curing is well underway.
Cure rate varies with temperature, humidity, and the paint system used; waterborne basecoats differ from solvent-borne systems, for example. If you notice a tacky feel or persistent solvent smell past the expected window, contact the repair shop instead of attempting aggressive cleaning. Timing your care correctly preserves gloss, adhesion, and the repair’s long-term durability.
Which Washing Techniques Protect Your New Car Paint?
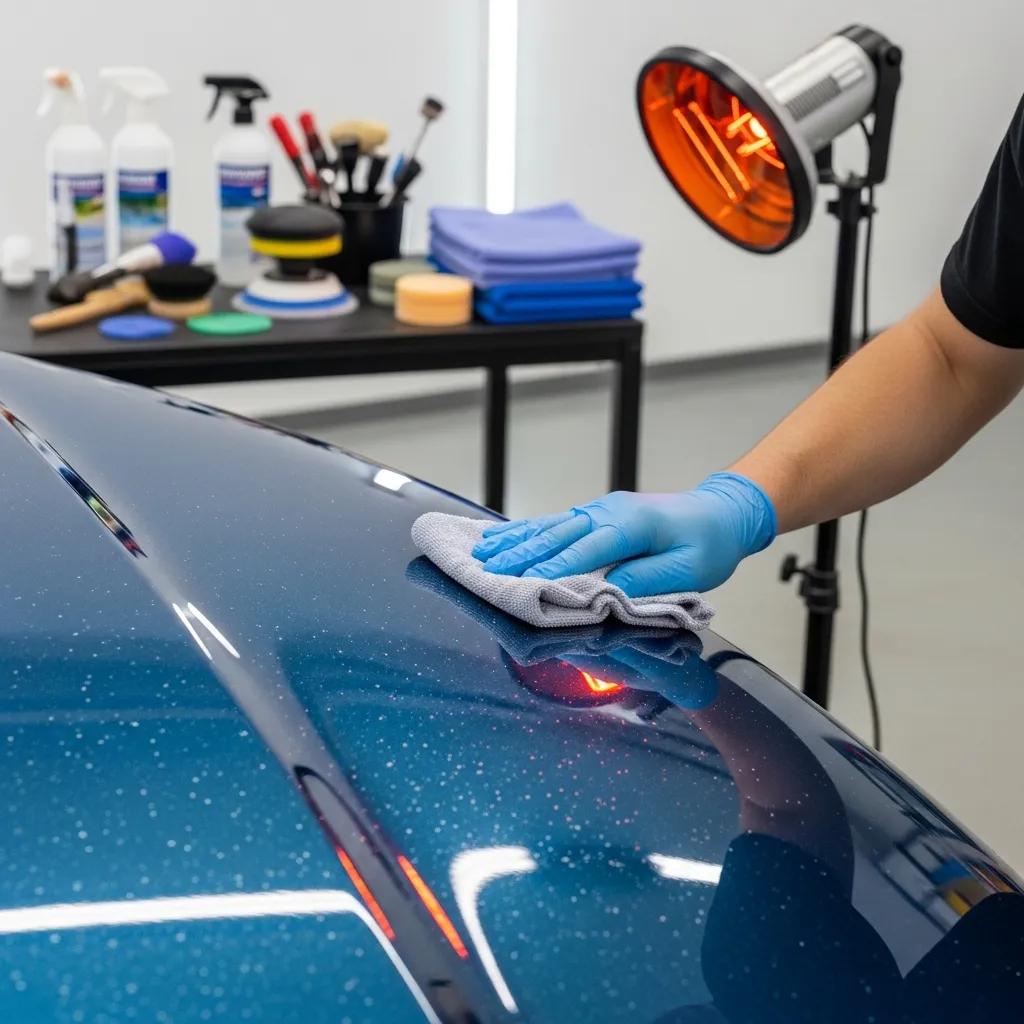
After bodywork, cleaning should remove contaminants without abrading a still-soft clearcoat. For spot-cleaning, use a damp microfiber cloth and a pH‑neutral car shampoo. Avoid automated car washes with stiff brushes or harsh chemicals during the cure period. Once the shop’s specified wait period has passed, a two-bucket hand wash, soft microfiber mitts, and blot-drying with a clean microfiber towel are recommended.
- Wash with a pH‑neutral shampoo and a soft microfiber mitt to lift dirt gently.
- Use the two-bucket method — one for rinse, one for soap — to reduce grit transfer.
- Address bird droppings or tar immediately with a mild, solvent‑free spot remover and a soft cloth.
- Delay rotary polishing and abrasive compounds until the full curing timeframe has passed.
Following these steps lowers the risk of swirl marks and clearcoat damage, and prepares the surface for later protection like wax or ceramic coatings.
When and How Should You Wax Your Vehicle After a New Paint Job?
Don’t apply waxes, sealants, or coatings until the paint has fully cured — generally 30–60 days. Applying protection too early can trap solvents or interfere with the clearcoat’s cross-linking, causing uneven appearance or reduced performance, and it can complicate warranty issues if it hides curing-related defects. Once the shop confirms the paint is cured, prep the surface with a gentle wash, clay bar if necessary, and make sure the finish is free of contamination before applying any protective product.
Before applying protection, follow this surface-prep checklist:
- Wash the vehicle with a pH‑neutral cleaner to remove oils and road film.
- Use a clay bar if you can feel embedded particles under your fingertips.
- Inspect in soft, indirect light to confirm a smooth, even finish.
- For professional ceramic coatings or PPF, use trained applicators to avoid trapping solvents beneath a coating.
The table below compares common protection types, typical wait guidance, and when each makes the most sense.
This comparison can help you pick the right protection for durability and appearance:
| Product Type | Cure Wait Time Required | Best Use Case |
|---|---|---|
| Paste/Carnauba Wax | Wait full cure (30–60 days) | Quick DIY gloss and sacrificial layer; short‑term protection |
| Synthetic Sealant | Wait full cure (30–60 days) | Longer lasting weather resistance with easy application |
| Ceramic Coating | Wait full cure and ensure a contamination‑free surface | Long‑term protection and hydrophobic performance; pro installation recommended |
| Paint Protection Film (PPF) | Apply after shop final inspection (usually after initial cure) | High‑impact areas for chip resistance; professional fitting required |
What Are the Best Wax Types for Post-Repair Paint Protection?
Once paint is fully cured, synthetic sealants and professionally applied ceramic coatings typically offer the best balance of protection and longevity. Paste or carnauba wax gives immediate gloss and is easy to apply, but it wears faster and needs frequent reapplication. Ceramic coatings form a durable molecular barrier that resists UV, chemical etching, and light abrasion — a good choice for vehicles that need long‑lasting protection after major repairs.
Consider durability when you choose: carnauba waxes may last weeks to a few months, synthetic sealants often last 6–12 months, and ceramic coatings can last several years with proper upkeep. If you had safety‑related structural repairs, check with the repair shop about manufacturer‑recommended coating procedures to avoid potential warranty conflicts.
How Does Waxing Affect Paint Durability and Appearance?
Protective products create a sacrificial layer that shields the clearcoat from UV, bird acids, and light abrasives, improving gloss and slowing degradation. Waxes add temporary hydrophobic properties and a deep shine, while sealants and ceramic coatings offer longer‑lasting protection and make washing easier. Applying protection too early, however, can trap solvents and dull the finish — so timing is critical for cosmetic results and long‑term durability.
After applying protection, keep up seasonal washes and scheduled reapplications for wax or sealant to maintain benefits and resale appearance. Choose the protection that fits your priorities — short‑term shine versus long‑term durability — and align it with the paint cure guidance your repair facility provides.
What Are the Key Steps in Inspecting Your Vehicle After Auto Body Repair?
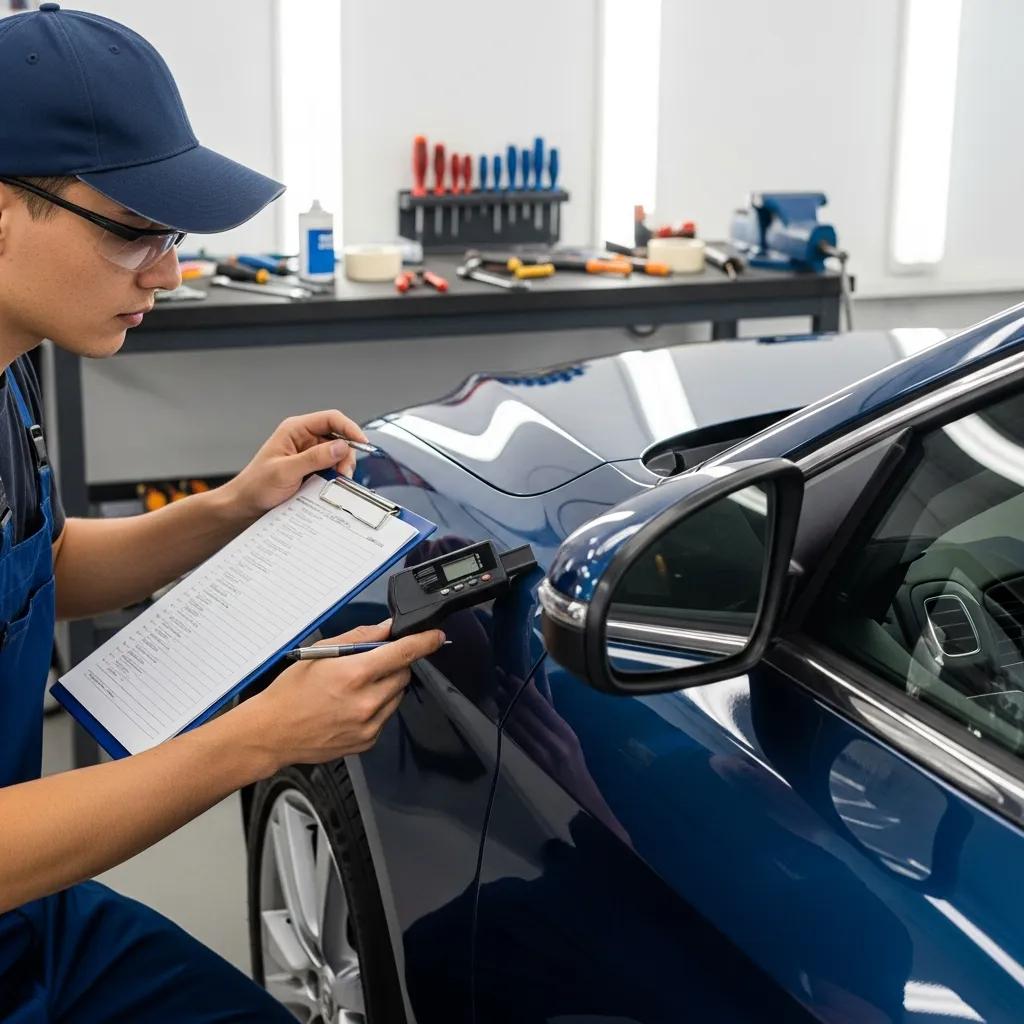
A focused post‑repair inspection checks cosmetic quality, functional operation, and safety‑critical fitment. Start with a slow walk‑around to confirm paint match, surface texture, panel gaps, and trim alignment. Then test doors, windows, lights, and seals. Finish with a short road test to listen for unusual noises, detect alignment or steering pull, and verify brakes and suspension feel normal. Take photos and notes and return to the shop promptly with any concerns so rework can be scheduled while warranty coverage applies.
Use this quick checklist to cover the essentials:
- Confirm color match and consistent clearcoat gloss across repaired panels.
- Check panel gaps and trim alignment for uniform fit and finish.
- Test lights, switches, windows, latches, and door closures for correct operation.
- Take a short test drive to identify alignment issues, suspension noise, or unexpected vibrations.
- Look under the vehicle for fluid leaks near repair seams or mechanical areas.
- Watch dashboard lights and sensor behavior during and after the test drive.
How to Use a Post-Repair Inspection Checklist Effectively?
Be methodical: start with a daylight walk‑around, photograph any questionable areas, then run functional tests and a brief road test. Record the date, mileage, and weather so your documentation supports warranty or insurance follow-up. If you find problems, contact the repair shop within the recommended follow‑up window — commonly within one to two weeks — to arrange a reinspection or supplemental estimate.
On‑the‑spot photos reduce ambiguity and speed verification with insurers or the shop. We recommend an initial inspection at delivery, a re‑check at 7–14 days, and another review at the 30–60 day mark to catch any issues that appear as parts settle or paint finishes finish curing.
What Signs Indicate Quality or Poor Auto Body Work?
High‑quality repairs show even panel gaps, smooth paint texture and gloss, secure trim, and hardware that operates without rattles or binding. Warning signs include mismatched color or sheen, isolated orange peel texture, visible sanding marks, uneven gaps, paint runs, overspray on nearby parts, or loose trim. Mechanical red flags include persistent noises, fluid leaks, or warning lights after repair — these require immediate follow‑up.
If you see minor cosmetic issues, like slight color shifts under different light, ask the shop to note and monitor them. More serious fitment, structural, or safety concerns should be escalated to the repair facility and your insurer right away. The next section explains how OEM‑certified repairs reduce many of these risks.
| Component | What to Inspect | Signs of Concern |
|---|---|---|
| Panels & Paint | Color match, texture, clearcoat gloss | Mismatched color, sanding marks, paint runs |
| Trim & Seals | Alignment, secure fasteners, seal continuity | Loose trim, gaps, water intrusion points |
| Mechanical/Underhood | Fluid leaks, mounts, visible welds | Leaks, cracked mounts, incomplete welds |
| Electrical & Sensors | Lights, switches, error codes | Inoperative lights, persistent warning lamps |
How Do OEM Certified Repairs Benefit Your Vehicle and Warranty?
OEM‑certified repairs follow manufacturer procedures and use approved materials, helping preserve the vehicle’s designed crash performance and ensuring sensors, restraint systems, and structural parts work as intended. Using OEM parts and factory methods supports correct fit, calibration, and compatibility with safety systems — which in turn helps preserve warranties and resale value. Certifications like I‑CAR alignment show technicians trained to follow documented workflows, reducing the chance of missed safety‑critical repairs.
Prime Time Collision Center focuses on factory‑quality repairs and employs I‑CAR Platinum‑certified technicians who follow OEM procedures; that helps maintain manufacturer expectations for crash performance and warranty continuity. Choosing an OEM‑certified facility lowers the risk of sensor mismatches, improper structural repairs, or finish problems that can occur when nonstandard parts or methods are used. If you want documented OEM procedures and written records at intake, request them — they add an extra layer of protection during the claims process.
| Part Type | Attribute | Benefit |
|---|---|---|
| OEM Structural Components | Exact fit and calibrated geometry | Preserves crash performance and safety |
| OEM Airbag/Sensor Elements | Manufacturer‑tested compatibility | Ensures reliable deployment and sensor accuracy |
| Aftermarket Generic Parts | Varies by maker | May reduce resale value or complicate warranty claims |
Why Choose an OEM Certified Collision Repair Shop?
An OEM‑certified shop follows manufacturer specifications, uses approved tools, and documents procedures to meet factory standards. Certification usually means technicians completed specific training, processes are documented, and the shop invested in the right equipment — all of which help ensure accurate repairs for modern electronics and safety systems. Owners get clearer warranty handoffs, evidence of compliance, and a lower risk of future failures caused by improper repair methods.
Ask the shop for proof of certification and documentation that OEM procedures were followed; those records help when dealing with insurers or future buyers. Certification shows technicians completed training modules specific to your vehicle’s make and model, which supports safety and functional integrity after repairs.
How Do OEM Parts Preserve Vehicle Safety and Resale Value?
OEM parts are designed to match factory tolerances, sensor interfaces, and structural designs, which helps maintain crash energy management and consistent component performance. Documenting the use of OEM parts and factory processes supports higher resale value because buyers and lease return inspectors prefer or require evidence of manufacturer‑standard repairs. For leased vehicles, documented OEM repairs can simplify return inspections and help avoid unexpected charges.
When aftermarket parts are acceptable for non‑safety areas, keep receipts and document the choice. For airbags, structural members, and sensor‑heavy components, OEM replacements remain the recommended route to preserve safety and resale confidence.
What Is the Recommended Maintenance Schedule for Vehicles After Collision Repair?
A phased maintenance schedule helps catch delayed issues and protect long‑term performance after repairs. Suggested intervals include an initial inspection at delivery, a 1‑month check for paint curing and fitment, a 3‑month review for alignment and sensor behavior, and yearly inspections thereafter to monitor corrosion and wear. Routine checks should include alignment verification, fluid inspections, tire wear patterns, and undercarriage exams to spot developing corrosion or seal failures.
Follow this practical schedule:
- Immediate: Walk‑around inspection and documentation when you pick up the vehicle.
- 1 month: Re‑check paint cure, panel gaps, and any small leaks or trim movement.
- 3 months: Verify alignment, suspension behavior, and sensor operation after parts settle.
- Annually: Inspect the undercarriage, seams, and touch up protective coatings as needed.
These checks help you find emerging problems early and limit long‑term costs. The next sections cover rust prevention and interior care.
How to Prevent Rust and Corrosion After Auto Body Work?
Protect exposed metal and seams with seam sealers, rust inhibitors, and professional undercoating when appropriate for your climate. Regularly wash wheel wells, rocker panels, and the undercarriage — especially after winter or driving on salted roads — to remove corrosive buildup. Inspect seams and welds at each scheduled check and ask the repair shop about factory‑style rust‑proofing if you live in a high‑salt area.
Seasonal attention and immediate spot repairs to chips or exposed metal greatly reduce the chance of long‑term corrosion near repaired zones. If you spot blistering, bubbling, or active rust around seams, bring the vehicle back to the repair facility for evaluation right away.
What Interior Car Care Tips Are Essential After an Accident?
After a collision and repair, verify interior safety features, upholstery, and electronics work properly. Confirm airbag readiness by watching for any persistent warning lights and test seatbelt latches and power seat functions. Deep‑clean upholstery and remove debris to prevent trapped moisture that can cause odors or deterioration; document any lingering smells or electrical quirks for follow‑up.
If interior modules were serviced or replaced, request written verification that electrical connections and software calibrations were completed. Report persistent odors, odd HVAC behavior, or warning indicators to the repair facility promptly for targeted reinspection.
How Can You Navigate Warranty and Insurance Processes Post-Repair?
Knowing how warranties and claims work helps protect the repair result and manage any supplemental work efficiently. Body shop warranties typically cover workmanship and sometimes parts supplied by the facility; manufacturer warranties may still apply to OEM parts. Keep repair receipts, technician notes, and the shop’s service documentation to support warranty claims and insurance follow‑ups if issues appear after delivery.
Common steps for handling post‑repair warranty and insurance matters:
- Document the issue with photos, dates, and mileage, and contact the repair shop promptly.
- Request a reinspection and a written estimate for any supplemental repairs.
- Notify your insurer if the repair affects claim settlement or a supplemental estimate is needed.
Prime Time Collision Center helps customers with insurance claim handling, free estimates, and coordinated follow‑up inspections; we work with all major insurers and support claim documentation and rework requests. For complex warranty questions, we can coordinate with insurers and advise on manufacturer escalation.
What Does an Auto Body Repair Warranty Typically Cover?
An auto body repair warranty usually covers the facility’s workmanship — things like paint adhesion and fitment — and may cover parts the shop supplied for a set period. Exclusions often include damage from subsequent accidents, misuse, or neglect; owners are expected to follow care instructions and keep documentation. Preserve warranty coverage by following the shop’s post‑repair care guidance and retaining service records and photos.
If a covered defect appears, provide the shop with the original repair order, photos, and a clear description so they can verify and schedule corrective work under warranty. Good documentation speeds the process and reduces disputes over whether a problem is from the original repair or a later event.
How to Handle Insurance Claims for Auto Body Repairs?
If post‑repair issues affect a settled claim or require supplemental work, document the problem and contact both the repair shop and your insurer. Ask the shop for a supplemental estimate if additional repairs are needed, and request that they coordinate directly with your adjuster when possible. If you’re leasing or financing, keep thorough records of OE procedures and documented repairs for lease‑end inspections or lender reviews.
If you need help, Prime Time Collision Center offers insurance claim support, free estimates, and can coordinate towing or reinspection logistics when necessary; ask us to document findings and submit supplemental estimates on your behalf. To schedule a follow‑up inspection or a free post‑repair estimate, contact the shop and we’ll set up an appointment for verification and coordinated claim support.
Frequently Asked Questions
What should I do if I notice issues after my car repair?
Document any issues right away with clear photos and notes. Contact the repair shop as soon as possible — ideally within one to two weeks — so they can inspect and correct problems while warranty coverage is likely still in effect. Prompt reporting makes it easier to address cosmetic, fitment, or mechanical concerns without added expense.
How can I ensure my vehicle’s warranty remains valid after repairs?
Follow the repair shop’s post‑repair care instructions, keep all receipts and service records, and perform recommended inspections. Using OEM parts for future safety‑critical repairs and documenting any work also helps protect warranty coverage. Regular checks and maintenance make it easier to spot issues early and preserve warranty rights.
What are the signs that my vehicle needs a follow-up inspection after repairs?
Look for persistent dashboard warning lights, strange noises, visible paint defects like bubbling or peeling, changes in handling or alignment, or any fluid leaks. These are clear reasons to request a follow‑up inspection promptly to prevent larger problems and protect warranty coverage.
How often should I perform maintenance checks after a collision repair?
Perform an initial inspection when you pick up the vehicle, re‑check at one month to assess paint curing and fitment, do a more thorough review at three months for alignment and sensors, and continue with annual inspections to monitor corrosion and wear. This schedule helps you catch delayed issues before they become costly.
What should I look for during a post-repair inspection?
Check for consistent paint color and texture, inspect panel gaps and trim alignment, and test lights and switches. Take a short test drive to listen for noises and evaluate handling. Photograph and document anything that looks or feels off, then contact the repair shop for verification and corrective work if needed.
Can I wash my car immediately after a repair?
Not usually. Most modern paint systems need 30 to 60 days to reach normal cure levels before routine washing. Washing too soon can damage a soft clearcoat. Follow the repair shop’s guidance; until the paint is cured, gentle spot cleaning with a damp microfiber cloth is the safest option.
What are the benefits of using OEM parts for repairs?
OEM parts are made to factory specifications, which helps ensure proper fit, sensor compatibility, and crash performance. Using OEM parts supports warranty preservation and can improve resale value because buyers and lease inspectors prefer documented, manufacturer‑standard repairs. For safety‑critical components, OEM parts are the recommended choice.
Conclusion
Thoughtful post‑repair care keeps your vehicle safe, looking its best, and protected under warranty. Follow the recommended inspection timeline, use OEM‑aligned repairs when appropriate, and return to a qualified collision center if anything looks or feels wrong. If you need help or want a shop‑specific reinspection, contact Prime Time Collision Center — we’ll walk you through next steps and keep your vehicle in top condition.


