


Recognizing the Signs of a Dying Car Battery — How to Spot Problems and What to Do
Car batteries usually start to fail with small, easy-to-miss signals. Catching them early can save you the hassle of a tow, a breakdown, or an unexpected repair bill. This guide shows you how to recognize common battery symptoms, read dashboard warnings, and take the right next steps — from quick DIY checks to when it’s time to bring the car in for professional testing. We explain the why behind each symptom (voltage drops, rising internal resistance, terminal corrosion) so you understand which fixes restore reliability and when replacement is the correct choice. You’ll learn the typical signs of a failing battery, how to spot and treat corrosion, what clicking noises mean, how to interpret the battery light, and which tests give a reliable picture of battery health. Throughout, we use straightforward diagnostic steps — battery parts, electrical load, starter interaction — to help you link symptoms to causes and make safe, confident decisions about your vehicle.
What Are the Common Symptoms of a Failing Car Battery?
A failing battery shows itself when it can’t hold steady voltage or deliver the current the vehicle needs. Causes include low charge, higher internal resistance, or bad cells. Spotting these signs early lowers your chance of being stranded and helps you decide whether a recharge, terminal repair, or full battery replacement is needed. Below are the most common symptoms and what they usually tell you about battery and electrical system health.
Common failing battery signs include:
- Slow engine crank — the starter turns slowly when you try to start the car.
- Dim headlights or weaker interior lights when accessories are on.
- A dashboard battery warning light that stays on or odd electrical behavior.
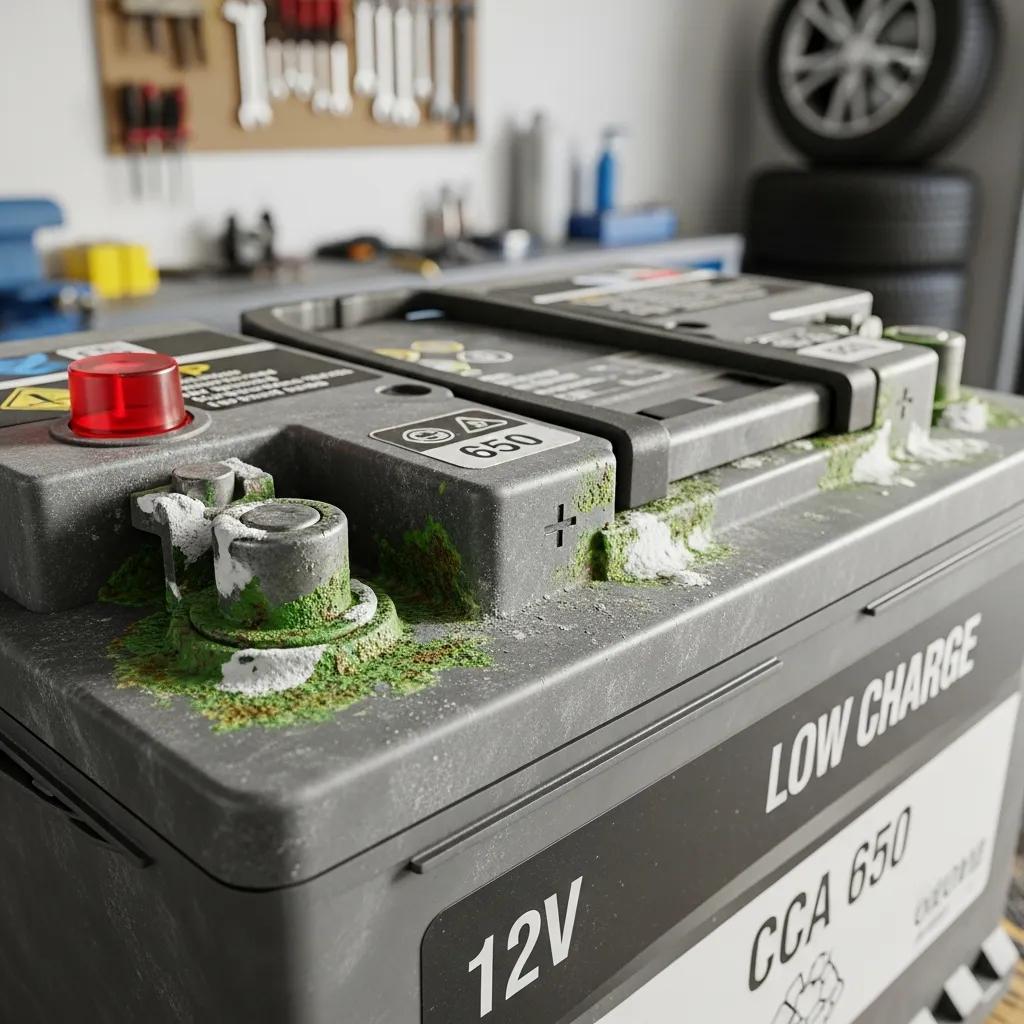
- Visible corrosion — white, blue-green, or gray powder around the terminals.
These symptoms often overlap because the battery is the vehicle’s main electrical energy source. Understanding the root cause helps avoid blaming the starter or alternator incorrectly. The table below pairs symptoms with likely causes and quick actions so you can prioritize a response.
| Symptom | Likely Cause | Immediate Solution |
|---|---|---|
| Slow engine crank | Low state of charge, weakened cells, or high internal resistance | Try a controlled jump-start or recharge; schedule a battery test |
| Dim headlights | Voltage drop under load from low reserve capacity | Reduce accessory load; test battery voltage and charging system |
| Clicking on start | Not enough current reaching the starter solenoid | Attempt a jump-start; inspect and clean terminals |
| Battery warning light | Charging system fault or battery deterioration | Check alternator output and battery voltage; get diagnostics |
This quick comparison links each symptom to the electrical mechanism involved and a practical next step: battery → supplies → vehicle electrical load. That link helps drivers and technicians tell temporary charge problems from permanent battery failure — which leads into more detailed checks like cranking behavior and headlight dimming.
How Does a Slow Engine Crank Indicate Battery Issues?
Slow cranking happens when the starter motor doesn’t get enough current to spin the engine quickly — a direct sign the battery can’t deliver the required load. Common causes are a low state of charge, sulfated plates, or weak cells that reduce capacity; cold weather also lowers battery chemistry and worsens the effect. A controlled jump-start or a measured recharge can show if the battery has recoverable capacity. If slow cranking continues after a full charge, replacement is usually the right call. Spotting slow cranking as a battery symptom prevents misdiagnosing the starter and points you toward voltage measurement and load testing, which we cover later.
Why Do Headlights Dim When the Battery Is Weak?
Headlights dimming at idle or when accessories run means voltage is dropping under load — the battery can’t hold steady voltage as demand rises. In plain terms: increased load → voltage sag → dimmer lights. This usually signals low reserve capacity or high internal resistance. Alternator problems can also cause dimming, but if dimming happens alongside hard starting or a low resting voltage, the battery is the likely culprit. Measuring terminal voltage at rest and under load helps distinguish a weak battery from a charging-system issue. Knowing the mechanism — voltage drop under load — guides the right fixes: reduce accessories, recharge the battery, or get professional battery testing to decide on replacement.
What Does Car Battery Corrosion Look Like and Why Is It Important?
Battery corrosion shows up as flaky, powdery deposits around the posts and clamps — often white, blue-green, or gray depending on the metal and electrolyte interaction. Corrosion matters because it raises electrical resistance and hurts starting and charging. It forms when vapors escape vents or small leaks deposit salts on terminals: terminals → corrode → poorer contact. Left alone, corrosion can mimic a weak battery by blocking current flow even if the battery itself is still good. Cleaning the terminals usually restores contact and can fix electrical symptoms, but recurring corrosion may point to leaking cells or charging problems that need a deeper look. The table below helps you identify common corrosion types, where they appear, and their likely impact so you can prioritize cleanup and repair.
Before cleaning corrosion, follow the vehicle manufacturer’s safety guidance and use protective gear to avoid acid contact and sparks.
| Visible Sign | Typical Location | Risk to Performance |
|---|---|---|
| White powdery crust | Terminal posts and cable clamps | Moderate — raises resistance and can impede starting |
| Blue/green deposits | Around the positive terminal or vent caps | High — suggests electrolyte interaction or active leakage |
| Dark crusty buildup | Under battery hold-downs or insulated covers | Low to moderate — can hide corrosion and trap moisture |
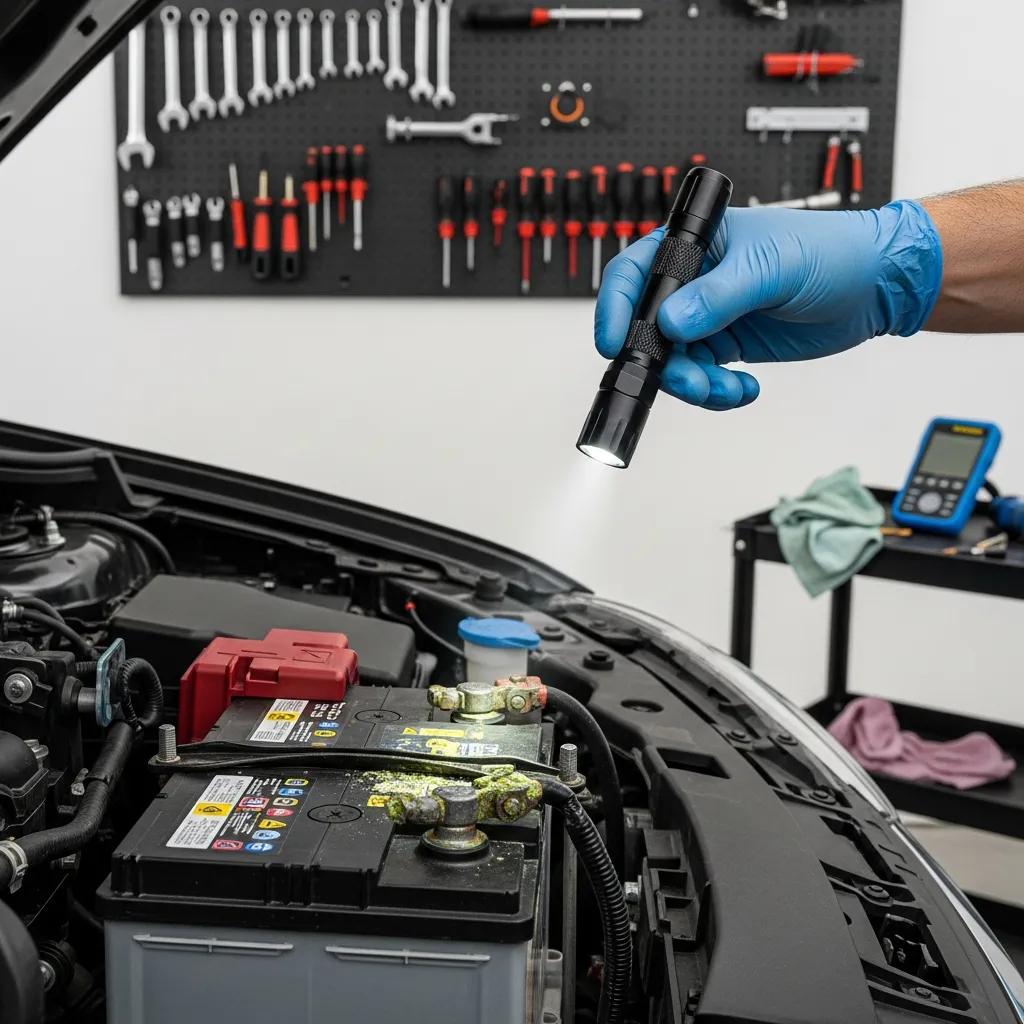
How to Spot Corrosion on Battery Terminals
Look closely for flaky deposits at the base of the posts and on clamp surfaces, check under terminal covers, and gently wiggle connections to spot looseness hidden by buildup. Corrosion usually collects where seals or vent caps let fumes escape; it can be easy to brush away or hardened into an insulating layer that interrupts contact. Wear gloves and eye protection while inspecting, and note if corrosion returns quickly after cleaning — that can mean a chronic sealing or charging issue. Regular checks during routine maintenance catch corrosion early so the battery can keep supplying steady voltage to your vehicle’s electrical system.
What Are the Effects of Corrosion on Battery Performance?
Corrosion raises resistance at the cable-to-terminal interface, reducing the current available to the starter and other systems and either mimicking or worsening weak-battery symptoms. That resistance causes voltage drop under load, reduces alternator charging efficiency, and can create intermittent electrical faults sometimes misread as battery failure. Cleaning terminals and replacing badly corroded clamps often restores proper conduction, but persistent corrosion may indicate a leaking cell or charging overvoltage that needs professional attention. Good maintenance — tight clamps, dielectric grease after cleaning, and checking vent caps — helps prevent recurrence and extends battery life by preserving conductive surfaces.
What Does a Clicking Noise When Starting Your Car Mean?
Rapid clicking when you try to start usually means the starter solenoid is engaging repeatedly because it isn’t getting enough current. In short: battery → not supplying → starter current → repeated clicks. A weak or discharged battery is a common cause, but loose cables, corroded clamps, or a failing starter relay can produce the same sound. Diagnose by eliminating simple issues first: clean and tighten terminals, check resting voltage, and try a jump-start to see if the clicking stops. Understanding the clicking pattern helps avoid replacing starter parts when the real issue is the battery or connections.
Is the Clicking Sound Always Related to the Battery?
Not always. Clicking is often battery-related, but loose cables, corroded terminals, or a bad starter relay can produce the same symptom while the battery itself is fine. The key test sequence is: measure battery voltage at rest and during cranking, inspect terminal integrity, and try a jump-start. If a jump-start stops the clicking, the battery or its charge state is likely at fault. If clicking continues after a jump and clean terminals, the starter circuit or starter itself should be checked. This method saves time and prevents unnecessary part swaps.
How to Differentiate Battery Clicking from Starter Problems?
Follow a simple diagnostic routine: measure resting voltage, clean and tighten terminals, then attempt a controlled jump-start. If the clicking stops and the engine cranks normally, the battery or its charge was the issue. Healthy resting voltage is about 12.4–12.7V; watch for voltage sag below roughly 9.6V during cranking, which indicates the battery can’t supply enough current. If voltage stays stable but clicking continues, suspect the starter or solenoid. These steps form a clear decision tree: low resting voltage or severe sag → battery problem; normal voltage with clicking → starter/circuit problem.
What Does the Car Battery Warning Light Mean on Your Dashboard?
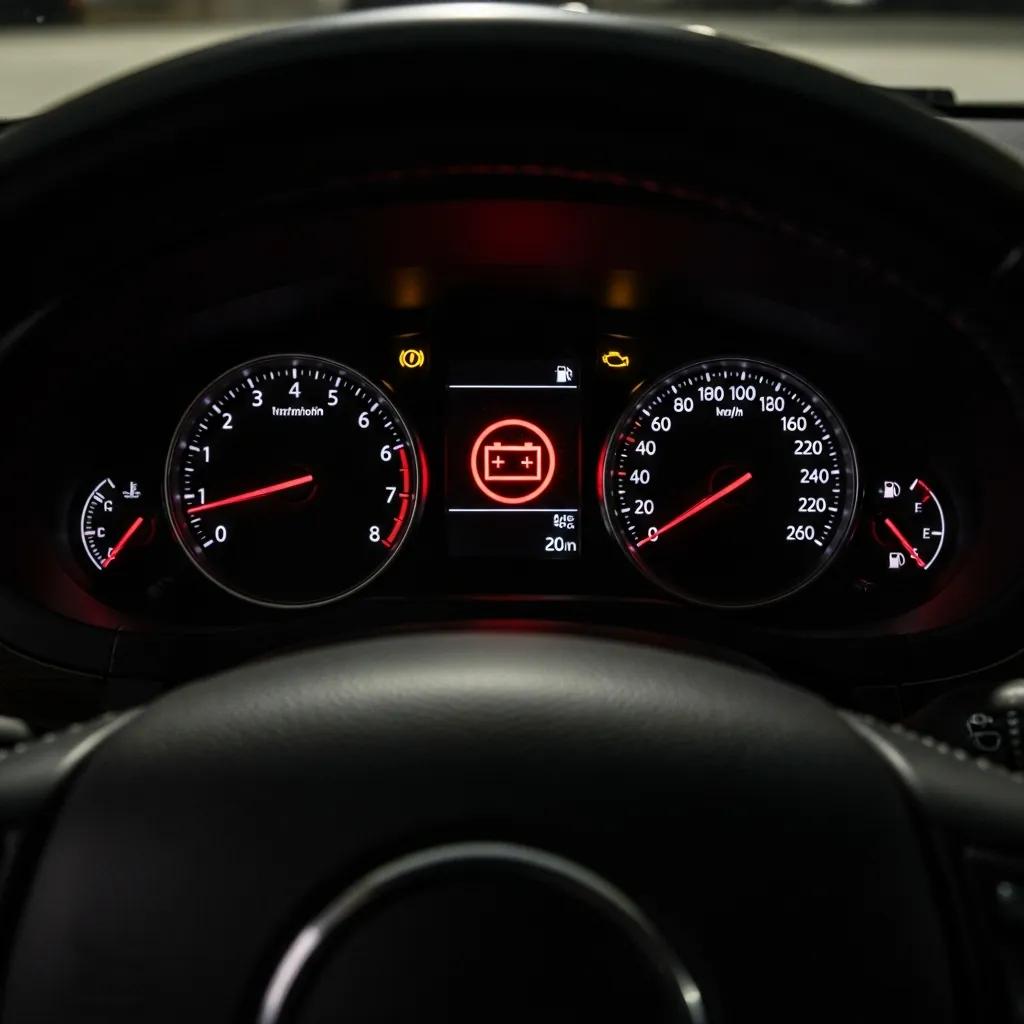
The battery warning light usually points to a charging-system issue — the alternator may not be charging, the battery may not accept charge, or a voltage regulator or wiring fault could be present. In system terms: alternator/regulator → not maintaining → battery charge → warning light on. Some vehicles will also trigger the light for a slipping belt or wiring issue that interrupts alternator output. When the battery icon lights up, don’t ignore it: driving with a bad charging system risks losing power to critical systems once the battery drains. Start with safe checks of charging voltage and proceed to targeted diagnostics to find whether the alternator, regulator, or battery is at fault.
When Should You Take the Warning Light Seriously?
Take the battery light seriously if it comes on while you’re driving or doesn’t go off after a short engine run. Those scenarios suggest the alternator isn’t replenishing the battery or voltage regulation has failed — either could lead to a total electrical shutdown. Immediate risks include loss of power steering, braking assist, and engine management as the battery depletes. If the light appears with dimming lights, strange electrical behavior, or stalling, reduce accessory load and move to a safe spot to inspect or get tested. Treat the warning light as a system-level symptom that needs prompt attention to keep you safe on the road.
How to Respond When the Battery Warning Light Appears?
When the battery warning light comes on, follow a calm, safety-first checklist:
- Safely pull over and turn off accessories like the stereo and air conditioning to cut electrical demand.
- Watch engine behavior for stalling or loss of power and avoid driving if symptoms worsen.
- Check for obvious problems such as a slipping or broken drive belt, smoke, or burning smells before continuing.
- Have the charging system tested by a qualified technician if the light stays on or symptoms get worse.
Following these steps lets you protect yourself and your vehicle while arranging diagnostics to find whether the alternator, battery, or wiring needs repair.
How Can You Test and Confirm a Dying Car Battery?
Testing mixes simple DIY checks with professional diagnostics to determine whether the battery is failing or another component is causing the symptoms. The basic idea is to compare measured values to expected norms at rest and under load. A typical protocol includes measuring resting voltage, watching behavior during a crank, and performing a controlled load or reserve-capacity test to see real-world performance. The table below summarizes common tests, what they measure, and when to use them; the following section gives safe DIY steps you can do yourself.
| Test | What It Measures | When to Use |
|---|---|---|
| Resting voltage measurement | Battery state of charge and cell balance | First-line check to screen for charging issues |
| Load or starter draw test | Ability to deliver current under demand | Confirms capacity for cranking |
| Alternator output test | Charging system voltage and current | Use when the warning light or charging symptoms appear |
What Are Simple DIY Battery Tests You Can Perform?
Easy tests you can do at home include a resting voltage check with a digital multimeter, watching voltage during cranking, and a controlled jump-start to see if symptoms are temporary. Start with the vehicle off for at least 30 minutes, then measure terminal voltage — a healthy resting battery reads about 12.4–12.7 volts; lower values mean partial discharge. During starting, a voltage drop below roughly 9.6 volts suggests insufficient cranking capacity and likely replacement. Use proper PPE and avoid sparks — these steps help you decide whether the battery is the issue or if you need professional testing.
When Should You Seek Professional Battery Testing?
Get professional testing when home checks are unclear, symptoms persist after cleaning and charging, or you see complex electrical behavior that could involve the alternator or regulator. Shops use conductance and load testing to measure internal resistance and remaining amp-hour capacity, giving a clear yes/no on replacement. Reasons to bring the car in include repeated battery failures after replacement, fast return of corrosion, or a persistent dashboard warning light with erratic electrical issues. Professional testing prevents unnecessary replacements and ensures any new battery meets OEM performance standards.
Prime Time Collision is a local auto body and collision repair shop focused on OEM-quality repairs, handling insurance claims knowledgeably, and building trust through transparent service. While battery diagnosis and replacement are typically done by parts and electrical specialists, collision-related electrical damage or post-repair checks often benefit from a shop experienced in restoring OEM electrical integrity and coordinating with insurers. If repair work involved hood removal, battery relocation, or body wiring, Prime Time Collision can confirm that battery mounts, cable routing, and charging connections are restored to factory standards — reducing the chance of intermittent battery problems after repair. Choosing a shop that prioritizes OEM-quality work helps prevent repeat failures that can be mistaken for a dying battery.
- Check resting voltage: Use a multimeter to confirm the battery’s state of charge before further testing.
- Inspect terminals and cables: Make sure connections are tight and corrosion-free to remove contact resistance issues.
- Test charging output: Measure alternator voltage with the engine running to verify proper charging.
- Seek professional testing: Use conductance or load tests when DIY steps don’t give a clear result.
These steps combine user-level checks with professional escalation so you can confirm a dying battery without replacing parts unnecessarily.
| Test Type | Diagnostic Focus | Typical Outcome |
|---|---|---|
| Multimeter voltage | Rest and cranking voltage | Quick pass/fail screening |
| Load/conductance | Internal resistance and capacity | Definitive replacement decision |
| Charging system check | Alternator/regulator output | Identifies charging faults |
The table above shows how different tests focus on battery cells, terminals, and alternator output — and how their results point to the right repair or replacement steps.
- Perform basic checks first: Resting voltage and terminal condition often reveal the cause.
- Use jump-starts cautiously: They confirm that a dead battery is the likely issue but don’t replace proper diagnostics.
- Prioritize professional diagnostics for persistent or complex issues: Accurate testing prevents misdiagnosis and unnecessary costs.
Following a clear diagnostic path ties symptoms to causes and practical solutions, helping you decide whether to recharge, clean terminals, or replace the battery while keeping your vehicle’s electrical system healthy.
Frequently Asked Questions
What is the average lifespan of a car battery?
Most car batteries last about three to five years. Lifespan depends on climate, driving habits, and maintenance. Hotter climates speed up degradation, while very cold weather reduces capacity. Regular checks — cleaning terminals and confirming proper charging — extend life. We recommend having your battery tested once a year once it’s around three years old to avoid surprises.
Can extreme temperatures affect battery performance?
Yes. High heat speeds up chemical reactions that can damage the battery and evaporate electrolyte, shortening life. Cold temperatures reduce the battery’s ability to deliver current, making starts harder. If you live somewhere extreme, consider a battery insulation kit or parking in a garage to help protect battery health.
How can I maintain my car battery to prolong its life?
Keep terminals clean and tight, make sure the battery is securely mounted to avoid vibration damage, and drive regularly so the battery gets recharged. Avoid many short trips that don’t let the alternator fully recharge the battery. In extreme climates, use insulation or a battery warmer. Regular professional checks will also catch issues early.
What should I do if my battery is dead?
If the battery is dead, try a jump-start with proper jumper cables and a donor vehicle. Connect positive-to-positive and negative to a grounded metal surface on the dead car. If the jump works, run the engine for at least 20 minutes to help recharge the battery. If the battery won’t hold a charge or shows heavy corrosion, it likely needs replacement. When in doubt, have a pro take a look.
Are there any warning signs that indicate I need a new battery?
Yes. Frequent slow starts, dim headlights, a persistent battery warning light, or clicking when you try to start are all signs a battery may be failing. Visible corrosion or a battery older than three years are other red flags. Regular testing helps you catch these issues before they strand you.
Can I replace my car battery myself?
Yes, if you have the right tools and follow safety steps. Wear gloves and eye protection, disconnect the negative terminal first, then the positive. Remove the old battery, install the new one, reconnect positive first, then negative. If you’re unsure or uncomfortable, let a professional handle it — batteries are heavy and can be hazardous if handled incorrectly.
Conclusion
Knowing the signs of a dying battery keeps you safe and saves time and money. Watch for slow cranks, dim lights, corrosion, and warning lights — and use the simple checks in this guide to decide whether to clean, recharge, or replace. For expert help and OEM-quality work after a collision or for charging-system checks, stop by Prime Time Collision — we’ll make sure your vehicle’s electrical system is restored correctly and reliably.


