


California Child Passenger Safety: A Practical Guide to Car Seat and Booster Rules
California law sets clear standards for restraining infants, toddlers and older kids so crash forces are managed and injuries are minimized. This guide walks you through what the rules require, why those rules matter, and the immediate steps caregivers should take after a crash to protect children and preserve restraint integrity. You’ll learn the age, weight and height triggers for rear‑facing, forward‑facing with a harness, and booster seats; how to perform the five‑step seat belt fit test; common installation mistakes and easy fixes; and what to do after an accident. We also explain enforcement, Kaitlyn’s Law to prevent heatstroke, and upcoming changes under Assembly Bill 435 taking effect in 2027. Where relevant, we highlight how proper collision repairs and restored anchor points affect car seat performance and where families in Glendale, CA can get local inspections. By the end, you’ll have clear, practical steps to stay legal and keep your child as safe as possible on the road.
How California Categorizes Car Seats by Age and Type
California separates child restraints into three basic categories: rear‑facing seats, forward‑facing seats with harnesses, and booster seats. Each category is based on a child’s age, weight, height and how well the belt fits. The goal is to match the child’s size and development with the restraint that best protects their head, neck and torso. Below is a quick side‑by‑side reference that balances the legal thresholds with current safety recommendations — read the table, then follow the H3 sections for detailed transition guidance.
This table summarizes common California thresholds and recommended timing for each restraint type.
| Restraint Type | Typical Legal Thresholds | Recommended Duration |
|---|---|---|
| Rear-facing car seat | Infants and toddlers; keep rear‑facing at least until age 2 or until exceeding the seat’s limits | Remain rear‑facing as long as the seat manufacturer allows (often beyond age 2) |
| Forward-facing harness | Use after rear‑facing limits are exceeded; follow seat’s weight/height limits | Keep child in the harness until they reach the seat’s top harness limit (commonly 40–65 lbs) |
| Booster seat | For children who outgrow the harness and are not yet safely belted by the vehicle seat belt | Use a booster until the child passes the five‑step fit test (commonly around age 8 or 4’9″) |
The table shows the typical progression from rear‑facing, to harnessed forward‑facing, to booster use. Always follow the seat manufacturer’s limits in addition to California law. The next sections explain rear‑facing rules and the signs that it’s time to switch to forward‑facing.
Rear‑Facing Requirements for Infants and Toddlers
Rear‑facing seats cradle a child’s head, neck and spine and spread crash forces across stronger parts of the body. California guidance and safety experts recommend keeping children rear‑facing until at least age 2 — and longer if they’re still under the seat’s rear‑facing weight or height limits. Many convertible seats allow rear‑facing past age 2, which provides added protection. Rear‑facing reduces neck extension in frontal crashes, the most common collision type, so correct harness routing and the proper seat angle are critical. If you’re unsure about angle or fit, check the car seat manual or visit a certified inspection station to avoid mistakes that weaken protection.
Keeping your child rear‑facing as long as the seat allows gives them the best protection and postpones the need to change harness routing or orientation. The following section explains when to move to a forward‑facing harness seat.
When to Transition to a Forward‑Facing Harness Seat
Move a child to a forward‑facing harness only when they exceed the rear‑facing seat’s weight or height limit, or when the manufacturer instructs you to do so — age alone shouldn’t be the deciding factor. Signs it’s time include the child’s shoulders being above the rear‑facing harness slots or the top of the head coming close to the seat’s top. In the forward‑facing position, the harness straps should sit at or above the child’s shoulders, be snug with no slack, and the top tether should be used and tightened when available to limit forward movement. Before you switch, review both the car seat manual and your vehicle owner’s manual to confirm correct installation and harness routing.
Transition timing depends on individual growth and seat limits rather than a strict age milestone. Next, we cover booster seat rules and the seat belt fit test that tells you when a child can safely use a vehicle lap‑and‑shoulder belt alone.
Booster Seat Rules and the Five‑Step Seat Belt Fit Test
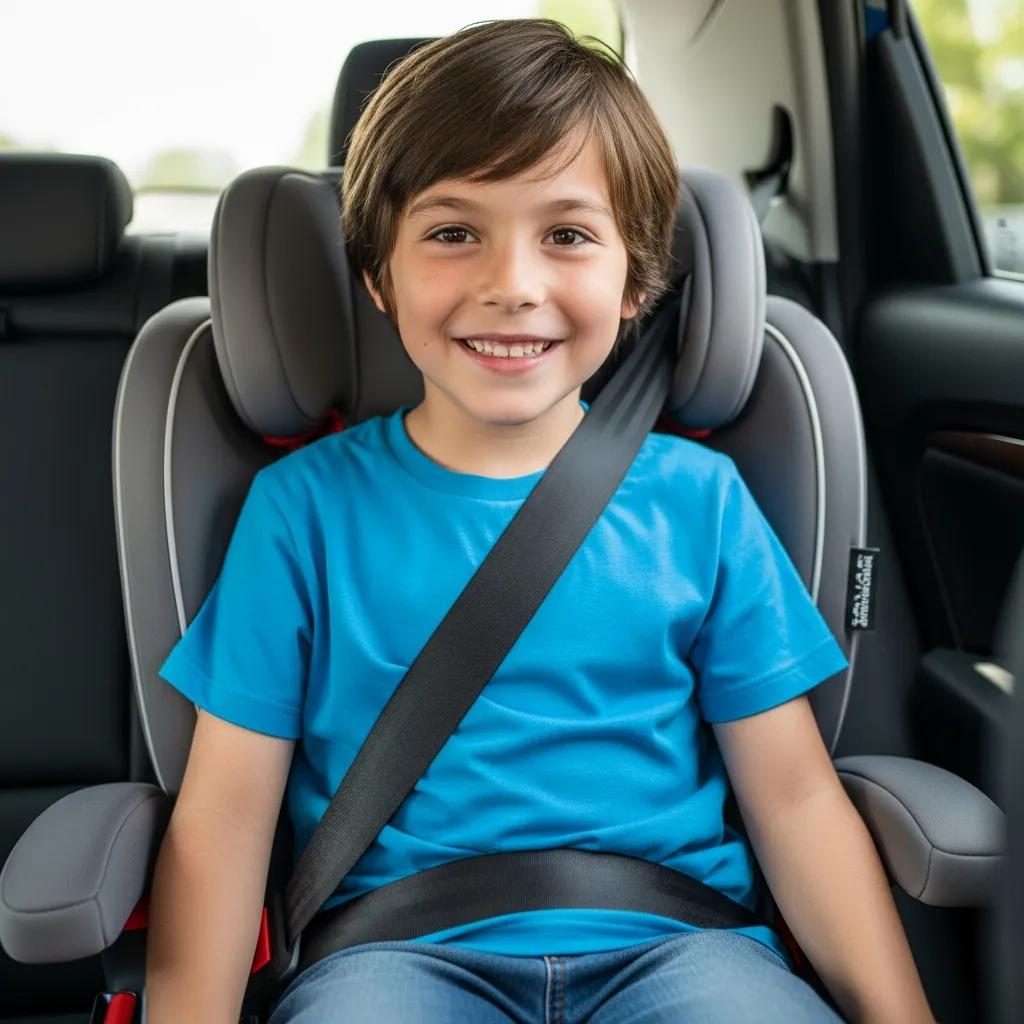
Booster seats position a child so the vehicle’s lap and shoulder belt fit the pelvis and chest correctly. California law requires children under age 8 to be secured in a federally‑approved child restraint system unless they are 4’9″ or taller and pass the five‑step fit test — but best practice is to keep using a booster until the belt fits right. The fit test checks how the lap and shoulder belts sit on the child; if the lap belt rides up on the abdomen or the shoulder belt rests on the neck, the child should stay in a booster. Below is a clear, numbered five‑step fit test you can use after confirming age and height basics.
Use these five steps to see if a child can safely ride without a booster:
- Back against the seat: Child sits all the way back with their back flat against the vehicle seat.
- Lap belt position: Lap belt lies low across the upper thighs, not on the stomach.
- Shoulder belt position: Shoulder belt crosses the shoulder and chest, not the neck or face.
- Knees bend: Child can bend their knees comfortably at the seat edge while sitting back.
- Can sit still: Child can remain in this position for the whole trip without slouching.
Use this checklist any time you change seats or vehicles. If the child fails any step, keep using a booster and recheck regularly. The table below maps each test element to simple pass/fail criteria to help you decide.
The table below shows each fit‑test criterion and a clear pass/fail outcome to guide transition decisions.
| Criterion | Test/Threshold | Pass / Fail |
|---|---|---|
| Back position | Entire back touches vehicle seat back | Pass if yes |
| Lap belt | Low on upper thighs, not across abdomen | Pass if belt rests on thighs |
| Shoulder belt | Crosses shoulder and chest, not the neck | Pass if it does not touch the neck |
| Leg position | Knees bend comfortably at the seat edge | Pass if comfortable bend |
| Behavioral | Child can sit correctly for the full ride without slouching | Pass if child remains seated properly |
This checklist makes it easy to see when a child truly fits an adult seat belt. After confirming fit, read the next section on installation basics to keep booster and belt performance reliable.
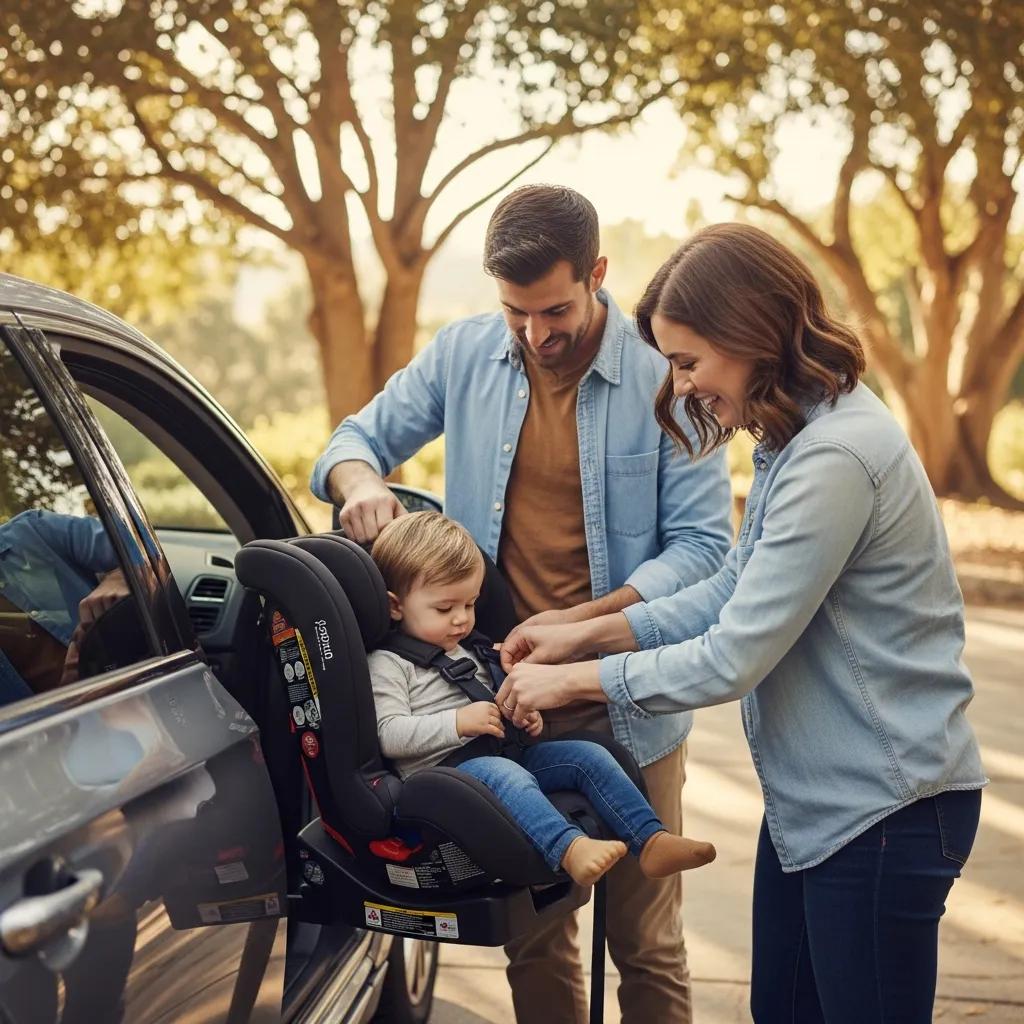
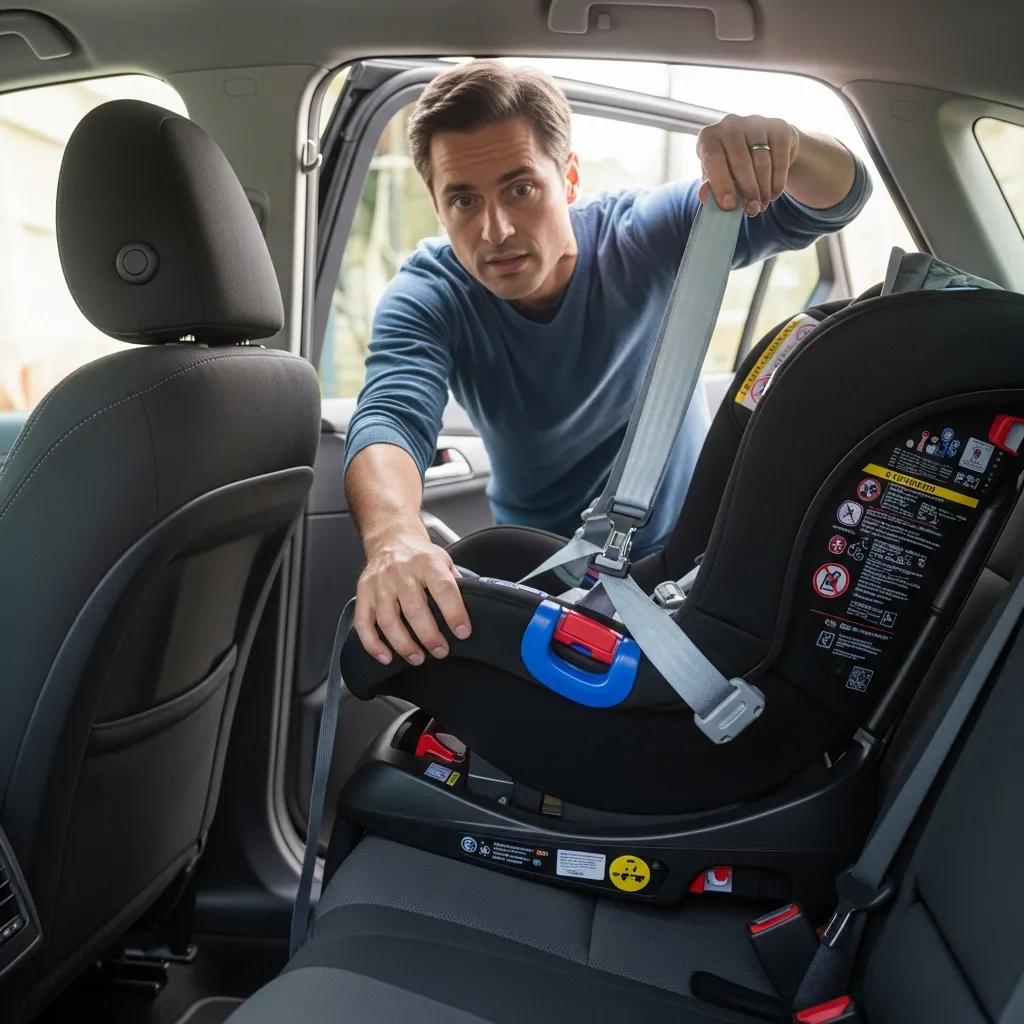
Why Correct Car Seat Installation Matters
A correctly installed car seat keeps the child attached to the vehicle structure so engineered energy‑management features can work in a crash. Installation secures the seat to vehicle anchor points — either LATCH or the seat belt — so the seat won’t rotate or move excessively during a collision. Proper harness routing and tightness, correct recline for rear‑facing seats, and using the top tether for forward‑facing seats all reduce injury risk. Catching common installation errors early prevents failures in a crash and preserves the protective geometry built into child restraint systems.
Installation mistakes are common but fixable. The next subsection lists the most frequent errors and how to correct them quickly.
Common Installation Mistakes and How to Fix Them
Many caregivers run into the same predictable installation issues — the good news is most are simple to correct. Use this quick checklist before you leave the parking lot.
- Loose attachment: If the car seat shifts more than one inch at the belt path, tighten the LATCH or seat belt until movement stops.
- Wrong harness routing: Make sure straps go through the correct slots — at or below the shoulders for rear‑facing, at or above for forward‑facing.
- Top tether not used: Connect and tighten the top tether on forward‑facing seats to reduce forward rotation.
- Incorrect recline angle: Adjust the base to the manufacturer’s recline indicator for safe airway positioning on infant seats.
- Harness slack: No more than a finger’s width of slack — tighten the harness and use the pinch test to confirm.
Checking these items improves the reliability of the restraint system and lowers injury risk. If you want professional confirmation, the next section explains where to get inspections locally and statewide.
Where to Find Car Seat Inspection Resources in Glendale and California
Certified car seat check events and CHP/NHTSA‑backed stations offer hands‑on installation verification and coaching. Many hospitals, police departments and community organizations host inspection clinics where certified technicians show the correct installation, harness fit and positioning for your specific vehicle and seat. A check is especially important after moving a seat to a new vehicle or after a collision, since anchor locations and seat geometry vary by make and model. Families in Glendale can look for CHP event listings and local health department calendars to schedule an inspection with an accredited technician.
Pairing a certified seat check with a post‑accident vehicle inspection helps ensure both the restraint and vehicle anchorage systems are safe. The next section covers legal consequences for non‑compliance and related protections.
Legal Consequences and Penalties for Not Following Child Passenger Laws
Failing to follow California’s child passenger laws can result in fines, court fees and documentation that may affect insurance or liability after a crash. Officers can issue citations when a child isn’t properly restrained by age, height and seat type, and repeat or serious violations can lead to greater penalties. Beyond fines, improper restraint that contributes to injury may influence civil claims or insurance outcomes, so following the law is both a safety and legal priority. The next subsection outlines typical fines and practical steps to take if you’re cited.
Typical Fines and What to Do if You’re Cited
Penalties usually include monetary fines and the requirement to correct the violation; enforcement often focuses on education and correction rather than maximum punishment. Ticket amounts vary by jurisdiction and circumstances and can include court fees or mandatory safety programs in some cases, especially if an injury occurred. If you receive a citation, document the corrective steps you take, attend any recommended classes or inspections, and make sure future trips meet the law. Consult the California Vehicle Code or your local CHP office for exact citation amounts and compliance options.
Documented corrective action and attending a certified car seat check can demonstrate good faith and reduce repeat risk. Next, we explain Kaitlyn’s Law and steps to prevent heatstroke in vehicles.
What Is Kaitlyn’s Law and How It Protects Children from Heatstroke
Kaitlyn’s Law aims to prevent tragic heatstroke incidents by restricting leaving young children unattended in vehicles. The law generally prohibits leaving a child six years old or younger alone in a vehicle without supervision from someone at least 12 years old and empowers bystanders and authorities to act if a child is in imminent danger. Preventive tips include always checking the back seat before locking the car, placing a routine item (phone, bag) in the back seat, and setting reminders or alarms. If you see a child in a hot car and they’re in danger, call emergency services immediately and follow local guidance to protect the child’s life.
Simple routines and public awareness remain the best defenses against heatstroke. The next section explains why OEM‑certified collision repairs matter for child restraint performance after an accident.
Why OEM‑Certified Collision Repairs Matter for Child Passenger Safety
OEM‑certified repairs restore a vehicle’s original geometry and restraint‑system function — factors that directly affect how car seats and seat belts perform in future crashes. Restoring LATCH anchors, seat mounts, pretensioners and airbag sensors to manufacturer specifications preserves the designed load paths and attachment strength that child restraint systems rely on. Repairs that don’t follow OEM procedures risk misaligned anchors, incorrect fastener torque or nonstandard parts, which can weaken attachment points and change how crash energy is absorbed. After a collision, your safety checklist should include an inspection of restraint anchors, documentation of repairs, and replacing car seats if the manufacturer advises.
Prime Time Collision Center offers OEM‑level collision repairs that support child passenger safety. Our technicians are I‑CAR Platinum certified and follow manufacturer repair procedures. We also help with insurance claims, provide free estimates, offer 24/7 towing and back our work with a lifetime warranty — all to help families restore their vehicle’s safety systems correctly after a crash. After any accident, prioritize an inspection of child restraint attachment points and consider OEM‑certified repair shops to return your vehicle to its original safety spec.
The table below compares repair items, the risks of improper repair, and the resulting safety impacts so you can see where OEM procedures are critical.
| Repair Item | Risk if Not Restored | Safety Impact / Recommendation |
|---|---|---|
| LATCH anchors | Misalignment or weakened anchors | Reduced anchorage strength; recommend OEM repair and correct torque specs |
| Seat belt pretensioners | Nonfunctional or incorrectly replaced components | Compromised timing of occupant restraint; replace per manufacturer instructions |
| Seat mounts | Distorted mounts or incorrect fasteners | Altered load paths; restore geometry to OEM standards |
| Structural rails | Poor alignment or non‑OEM parts | Changed crush behavior; require OEM‑certified structural repair |
The table highlights which parts most affect child restraint performance and why OEM‑quality repairs matter. The next subsection explains the technical reasons OEM repairs are important for anchorage points.
Why OEM Repairs Are Essential for Car Seat Anchorage Points
OEM repairs follow manufacturer procedures for fastener torque, material specs and geometric alignment so attachment points perform as designed under crash loads. Anchors and seat mounts are engineered to exact dimensions and strengths; using correct replacement parts and certified repair methods preserves the load‑bearing capacity child restraints require. Improper repair can leave anchors out of place, fasteners under‑torqued, or metal fatigue unaddressed — all of which reduce occupant protection. Keeping OEM repair records in your insurance file also helps prove safety‑critical components were restored properly, which matters for inspections and resale disclosures.
OEM restoration reduces uncertainty about post‑repair safety and helps caregivers decide if a car seat can stay installed or needs replacement. The next section gives clear criteria for replacing a car seat after a crash.
When to Replace a Car Seat After a Collision
Whether to replace a car seat after a crash depends on the crash severity, visible damage, manufacturer guidance and whether restraint systems were stressed or deployed. Most manufacturers advise replacing a seat after a moderate to severe crash, if you see cracked shells or broken parts, or if vehicle restraint systems deployed. Minor, low‑speed incidents with no visible damage and no change in seat geometry may allow continued use if the manufacturer and a certified inspector confirm it’s safe — but when in doubt, replace the seat. After an accident, document the collision, check the car seat manufacturer’s guidance and request an inspection of vehicle anchorage points before deciding to reuse the seat.
Prime Time Collision Center can inspect anchor points and advise families about car seat safety after a crash. We provide free estimates, 24/7 towing and a lifetime warranty to support thorough, certified repairs that protect child passengers. Pair vehicle inspections with manufacturer guidance before making replacement decisions.
What’s Changing in California Child Passenger Law in 2027?
Assembly Bill 435, effective January 1, 2027, shifts emphasis from age‑based rules toward fit‑based assessments, meaning enforcement will focus more on whether the seat belt properly fits the child rather than age alone. The change is intended to extend appropriate restraint use for children who still need boosters or harnesses based on their size. Caregivers should become familiar with the five‑step fit test, keep documentation of checks and be prepared to use boosters longer for some children. Start practicing the fit test now so transitions are smooth when the law takes effect and families know what to expect.
The following subsections summarize AB 435’s likely effects and give a short checklist you can use to prepare for stricter fit‑test enforcement.
How AB 435 Will Affect Car Seat and Booster Requirements
AB 435 places greater weight on belt fit rather than a simple age cutoff, meaning children who don’t pass fit tests may need to remain in harnesses or boosters even if they exceed previous age limits. The law encourages agencies to offer education and resources while giving law enforcement clearer fit‑based criteria for assessing compliance. Practically, some families will keep children in boosters or harnesses longer. Keep fit‑test documentation and consider scheduling certified checks to demonstrate compliance if needed. Reviewing your child’s fit now and scheduling inspections can reduce confusion during enforcement interactions and support consistent safety habits.
How Parents Can Prepare for the New Fit‑Test Rules
To prepare, measure your child’s height periodically, practice the five‑step fit test at home or at car seat check events, and keep booster options available longer if needed. Create a simple routine of trial fits once children reach late preschool or early elementary ages, test how different vehicle seats affect belt geometry, and keep records of certified inspections when possible. When deciding to transition, prioritize passing the fit test over hitting an age milestone and delay the move to an adult belt if any fit element fails. Certified technicians and local car seat check events will be valuable resources as regulations change.
Building these habits now will make compliance easier in 2027 and improve child safety during and after the regulatory change.
Frequently Asked Questions
What should I do if my child is involved in a car accident while in a car seat?
First, make sure your child is safe and get medical attention if needed. Then inspect the car seat for visible damage like cracks, broken parts or distorted webbing. Many manufacturers recommend replacing a seat after a moderate to severe crash, even if damage isn’t obvious. Check the car seat manual and consider having vehicle anchorage points inspected by a certified technician before reusing the seat.
Are there any exemptions to California’s car seat laws?
There are limited exceptions. For example, children who are 4’9″ or taller and who pass the five‑step fit test are not required to use a booster. Different rules can apply on public transportation, taxis or buses. Even when exempt, it’s safest to use the appropriate restraint whenever possible.
How can I ensure my car seat is installed correctly?
Always follow the car seat manufacturer’s instructions and your vehicle owner’s manual. Use either the vehicle seat belt or the LATCH system and make sure the seat doesn’t move more than one inch at the belt path. Confirm the harness is snug and routed correctly for your child’s size. If you’re unsure, attend a certified car seat check where a technician can inspect and show you how to install it properly.
What are the signs that my child is ready to transition from a booster seat to a regular seat belt?
Your child is ready when they pass the five‑step fit test: sitting all the way back, lap belt low on the thighs, shoulder belt across the shoulder and chest (not the neck), knees bent at the seat edge and the ability to sit properly for the whole trip. Many kids reach this around age 8 or at 4’9″, but individual growth varies.
What should I do if I receive a citation for not complying with car seat laws?
If you’re cited, correct the violation right away, document what you changed and attend any recommended safety classes or inspections. In some cases, completing a certified safety program can help. Check local authorities for the citation’s specific requirements and consult the California Vehicle Code for detailed information.
How can I find local car seat inspection events in my area?
Look for car seat checks through community health centers, hospitals, police departments and the California Highway Patrol. National groups like Safe Kids Worldwide also list certified inspection stations. Attending a check gives you hands‑on help from a certified technician and peace of mind that the seat is installed correctly.
Conclusion
Knowing California’s child passenger safety rules helps you protect your child and avoid legal trouble. Follow manufacturer limits, use the five‑step fit test before removing a booster, fix installation mistakes promptly, and get certified checks when in doubt. Stay aware of AB 435’s 2027 fit‑based changes and make OEM‑quality repairs after a collision to keep anchor points reliable. If you need help, Prime Time Collision Center offers certified repairs and inspections to support family safety on the road.


