


When and How to Change Your Car’s Air Filter — A Practical Guide to Keep Your Engine Running Strong
Your engine air filter stops dust, pollen and other debris from reaching the combustion chamber and sensitive sensors. Replacing it when needed helps maintain power, fuel economy and emissions controls. This guide explains what the engine air filter does, how a clogged filter affects combustion and parts like the mass airflow (MAF) sensor, and why a filter check belongs in both routine maintenance and any post-collision inspection. You’ll find the common signs of a dirty filter, manufacturer mileage recommendations, how driving conditions change replacement intervals, and an easy step-by-step DIY replacement with safety tips. We also cover DIY vs. professional service, typical costs, and how a collision-aware shop folds an air filter check into a full vehicle health inspection. Keywords like air filter change, engine air filter, and when to change air filter are used naturally to help you catch small problems before they become expensive repairs.
Why Replacing Your Car’s Air Filter Matters
The engine air filter removes particles from incoming air so combustion stays clean, the MAF sensor stays accurate, and internal parts don’t get abraded. Clean air helps the engine hold the correct air-fuel ratio for steady combustion, better fuel economy and sharper throttle response — and it keeps emissions lower. Letting a filter clog restricts airflow, forces the engine to run rich, and puts extra stress on sensors and components, which raises wear and repair risk over time. Knowing these effects makes it easier to prioritize air filter checks during routine servicing and after any accident where the intake could be contaminated or damaged.
Use the table below to match filter condition with likely vehicle impacts so you can quickly judge urgency and next steps.
| Filter Condition | Primary Mechanism Affected | Benefit / Impact |
|---|---|---|
| Clean filter | Unrestricted airflow | Improved fuel economy and power |
| Slightly dirty | Minor airflow restriction | Slight MPG loss; reduced throttle response |
| Heavily clogged | Significant restriction and contamination | Increased emissions, sensor errors, reduced engine life |
This mapping shows how filter condition translates into performance outcomes and why regular checks stop small restrictions from becoming sensor fouling or engine wear.
Benefits of Replacing Your Air Filter Regularly
Routine air filter replacement keeps airflow steady for efficient combustion, which helps fuel economy and preserves engine power. A clean filter shields the MAF sensor and intake ducts from contamination, lowering the chance of diagnostic trouble codes and erratic ECU behavior. Replacing the filter also reduces particulate wear on cylinders and valves, extending component life and cutting the risk of performance-related repairs. In dusty or urban environments, replacing the filter more often preserves emissions compliance and smooth everyday driving.
Together, these benefits lower operating costs and unexpected downtime — so pairing filter checks with other routine services improves overall vehicle reliability.
How a Clean Air Filter Supports Performance and Longevity
A clean filter ensures proper volumetric airflow so the engine can maintain its designed air-fuel ratio and efficient combustion, which reduces unburned fuel and soot that speed wear. Accurate MAF readings depend on clean intake air; when those readings are stable the ECU can optimize timing and fueling for longevity and responsiveness. Restricted airflow forces richer mixtures that raise carbon buildup and oil contamination, accelerating wear on pistons and rings. Timely filter replacement helps prevent those outcomes and preserves long-term engine health.
Recognizing this link explains why simple filter maintenance can prevent more expensive internal repairs and why it should be part of any full vehicle inspection.
Signs of a Dirty or Clogged Engine Air Filter
A dirty or clogged air filter produces clear symptoms that affect drivability, economy and emissions. Spotting them early lets you replace the filter before other parts suffer. Common signs include slower acceleration and throttle lag, worse fuel economy, black smoke under load, rough idle, and possible check engine light triggers tied to intake codes. A quick visual check — looking for dark, compressed media or trapped debris — will often confirm the need for replacement. Scanning for trouble codes helps determine if the MAF sensor or other intake parts need cleaning or service. Watch for these signs, especially after driving in dusty conditions or after a collision, to decide between a DIY swap or a professional inspection.
Here’s a quick checklist of typical symptoms so you can scan for problems during normal driving.
- Reduced power and acceleration: The car feels slower during passes or on climbs.
- Worse fuel economy: Noticeable drop in mpg versus your usual driving.
- Black smoke or rich exhaust smell: Visual or olfactory signs of incomplete combustion.
- Check engine light or hesitation: Intake-related codes or inconsistent throttle response.
Checking these indicators helps you decide the right next step — a quick filter swap or a professional check — and avoid cascading issues like sensor fouling or higher emissions.
How to Diagnose Reduced Power and a Check Engine Light
Reduced power shows up as slower throttle response and longer acceleration times; you may notice the engine working harder to maintain highway speed or climb grades. To diagnose, do a visual filter check, listen for intake whistling or odd noises, and read OBD-II codes that commonly point to MAF or airflow issues. If intake-related codes appear, replace or clean the filter and clear codes to see whether the problem resolves. If codes persist after the filter swap, you may have sensor or intake damage that needs a technician’s attention. These steps help you separate a simple maintenance fix from deeper intake repairs.
Acting early reduces the chance of unnecessary part replacement and makes sure any MAF or ECU corrections are triggered by real issues — not just a clogged filter.
Effect on Fuel Economy and Emissions
A clogged filter can lower fuel economy by forcing the engine management system to enrich the mixture, which increases fuel use and raises hydrocarbon and particulate emissions. Research and industry data show severe restriction can shave several percentage points off fuel efficiency, though the exact effect depends on the vehicle and driving. Higher emissions can also cause failure in emissions testing. Fixing filter issues promptly limits these losses and prevents soot build-up on sensors and the catalytic converter.
Knowing these measurable effects is another reason to replace a dirty filter — it improves driving feel and supports emissions compliance.
How Often Should You Change Your Air Filter?
Most manufacturers recommend replacing the engine air filter every 12,000–15,000 miles or about once a year under normal driving. But conditions like dusty roads, construction, heavy idling or towing can shorten that interval — sometimes to every 6,000–8,000 miles or require more frequent visual checks. Always check your owner’s manual for the OEM interval and consider adding an air filter inspection to multi-point maintenance or any post-accident inspection. Regular inspection balances strict mileage schedules with real-world driving conditions.
Short answer for quick reference: Most OEMs say 12,000–15,000 miles or yearly; replace sooner in dusty or heavy-use situations. The table below summarizes recommended intervals by condition.
| Driving Condition | Typical Manufacturer Interval | Adjusted Interval / Recommendation |
|---|---|---|
| Normal mixed use | 12,000–15,000 miles or yearly | Inspect annually; replace at interval |
| Dusty / off-road | 12,000 miles or less | Inspect every 3,000–6,000 miles; replace as needed |
| Heavy towing / lots of idling | 6,000–12,000 miles | Inspect semi-annually; replace sooner if restricted |
Use this table to adapt OEM guidance to your driving environment so you replace filters before performance or emissions suffer.
Manufacturer Recommendations and Mileage Intervals
OEMs typically list 12,000–15,000 miles or once per year as a baseline for most passenger cars, with different guidance for high-performance or diesel engines. Manuals usually stress visual inspections as well as mileage — severe operating conditions warrant earlier service. Consult your owner’s manual for the official baseline and combine that with local driving realities (frequent idling or stop-and-go traffic) to build a practical plan. Following OEM guidance also helps preserve warranty coverage where applicable.
Sticking to these recommendations while adjusting for local conditions keeps your engine running as designed and lowers warranty and compliance risk.
How Dust, Pollution and Driving Style Change Replacement Frequency
Areas with high airborne particulates — unpaved roads, construction zones or industrial neighborhoods — load filters faster and shorten replacement intervals. In those settings inspect the filter at each oil change or every 3,000–6,000 miles and replace sooner if needed to avoid MAF contamination and intake restriction. Urban pollution and heavy stop-and-go traffic also accelerate fouling from repeated small-load cycles and idling. For drivers around Glendale, CA and similar Southern California areas, adding frequent visual checks to routine maintenance offsets local dust and traffic impacts.
Tying service intervals to environmental stressors keeps performance steady and reduces the chance of downstream sensor or catalytic converter problems.
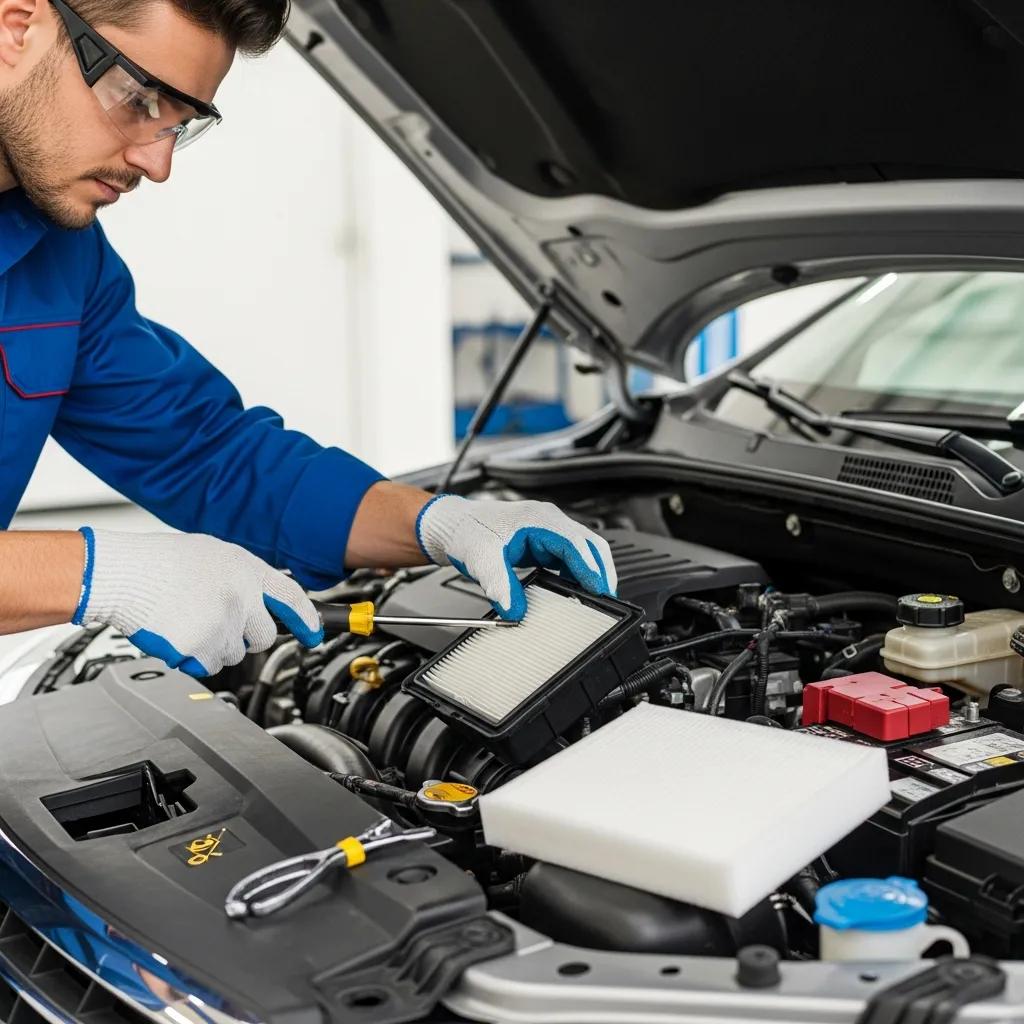
How to Replace Your Engine Air Filter: Step-by-Step

Changing the engine air filter is a straightforward job: locate the air filter housing, remove the old filter, clean the housing, and install the new filter in the correct orientation to restore proper intake flow. The key steps are to remove the dirty element, verify housing seals and clips are sound, and seat the new filter so no unfiltered air can bypass the media. Proper installation preserves airflow and sensor accuracy while keeping debris out. Below are the tools, safety notes and a numbered how-to for typical passenger vehicles.
Tools and Safety Precautions for a DIY Swap
Before you start, gather a screwdriver (flat or Phillips as needed), gloves, safety glasses and a clean lint-free rag. Park on level ground, set the parking brake, and make sure the engine is cool. Keep the new filter in its packaging until install to avoid contamination, and watch for loose debris falling into the intake when you open the housing. Check clips and seals for wear so you can reassemble the housing securely. These precautions reduce the chance of accidentally letting unfiltered air into the engine or misassembling the intake.
While the housing is open, take a quick look at related parts — ducting, clamps and the MAF sensor — so you can address any issues you find.
Minimum tools and safety steps:
- Screwdriver(s): For housing fasteners.
- Gloves and safety glasses: Protect hands and eyes from debris.
- Clean rag: Wipe the housing and sealing surfaces.
- Replacement filter: OEM or equivalent with correct fitment.
In short: the right tools and safety checks make the job quick and prevent mistakes that could let unfiltered air into the engine or damage intake parts.
Step-by-Step: Locate, Remove and Install a New Filter
Follow these steps for a typical replacement: find the rectangular or round airbox near the front/top of the engine bay, undo clips or screws to open it, remove the old filter while noting its orientation, clean the housing with a rag, seat the new filter correctly, and reassemble the housing ensuring a tight seal. While removing the old filter, check for oil or heavy debris that might indicate other problems, and visually inspect the MAF sensor and intake ducting for contamination. After reassembly, start the engine and listen for unusual intake noises to confirm a good seal. If the vehicle recently had collision damage or the intake path looks compromised, stop and have a qualified technician inspect it.
Professional inspection is recommended when intake components show signs of impact or contamination because hidden damage can affect performance and long-term reliability.
DIY or Professional Service: Which Is Right?
Whether you do the swap yourself depends on your confidence and tools, and whether the vehicle has post-collision damage, warranty rules, or a complex intake that needs precise reassembly. DIY saves money and works for many straightforward housings, but improper sealing, broken clips or missed intake contamination can cause problems. Professional service offers inspection, OEM-equivalent parts, documentation for insurance or warranty records, and multi-point checks that catch related issues. For vehicles involved in collisions or when you want documented, OEM-quality work, professional replacement is the safer choice.
Here’s a compact pros and cons list to help you decide.
- DIY Pros: Lower cost, immediate replacement, hands-on learning.
- DIY Cons: Risk of improper sealing, missed related issues, no formal documentation.
- Professional Pros: Certified technicians, OEM parts, inspection and written records.
- Professional Cons: Higher cost, appointment required.
For routine, simple jobs DIY is fine; when risk factors or documentation needs exist, professionals add clear value.
Pros and Cons of DIY vs. Professional Replacement
Doing it yourself is cost-effective and empowering for basic airbox designs — it’s a quick way to keep up with maintenance. But DIYers may miss related problems such as damaged ducting, MAF contamination, or incorrect filter fit that a trained tech would find, and DIY work doesn’t produce records useful for insurance or warranty claims. Professional service includes intake inspection, OEM or OEM-equivalent parts, and documentation that protects claims and resale value. If your vehicle is under warranty or was recently in a collision, professional inspection and replacement are recommended to preserve integrity and coverage.
How Prime Time Collision Center Delivers Quality with Certified Technicians and OEM Parts
At Prime Time Collision Center in Glendale, CA, our services are built around I-CAR Platinum certified technicians and a commitment to OEM-quality repairs. That means air filter and intake work is done to manufacturer standards and paired with multi-point inspections to spot intake, sensor or structural issues that can go with filter problems. We also help with insurance coordination, provide free estimates and back our work with warranties. Our shop offers free 24/7 towing and works with all major insurance carriers, making it easier when maintenance overlaps with collision repair.
Those elements make professional replacement a strong choice when vehicle history, warranty or evidence of impact makes accuracy and documentation important.
Cost to Replace an Engine Air Filter and How to Book Service
Costs vary by parts quality and whether service includes labor, inspection or related repairs. A DIY parts-only swap is the least expensive option; professional service adds inspection and documentation that can be worth the extra cost. Price factors include vehicle make and model, filter type (standard vs. OEM vs. performance) and whether additional intake or sensor work is needed. If the replacement is part of a collision claim, insurance may cover parts and labor — shops that handle insurance coordination can simplify that. The table below gives a practical cost comparison to set expectations.
| Service Option | Cost Component | Typical Cost Range |
|---|---|---|
| DIY parts-only | Replacement filter | $15–$50 |
| Professional service | Parts + labor + inspection | $50–$150 |
| Insurance-handled repair | Parts + documented labor | Varies by claim; consult shop |
This comparison helps you plan whether you want a budget parts swap or a full professional inspection with documentation for insurance or warranty needs.
Typical Price Ranges for Professional Replacement
Professional replacement usually runs about $50–$150 depending on labor rates, vehicle complexity and whether OEM parts are used. Luxury, high-performance vehicles or specialty filters can raise parts and labor costs, pushing toward the top of that range. Professional service often includes inspection time, possible MAF cleaning, and documentation that supports insurance or warranty claims — added value that helps prevent downstream issues. When you get quotes, ask whether the shop uses OEM or OEM-equivalent filters and whether a multi-point inspection is included.
Schedule Maintenance and Get a Full Vehicle Health Check at Prime Time Collision Center
To schedule service, request an appointment that combines an air filter replacement with a multi-point vehicle health check. Prime Time Collision Center in Glendale, CA handles maintenance alongside collision repairs, offers free estimates, and coordinates with insurers to streamline claims. Our I-CAR Platinum technicians perform OEM-aligned repairs and inspections, and we provide warranties on our work. Pairing a filter replacement with a health check uncovers related items — MAF sensor condition, ducting integrity and emissions concerns — in a single documented visit that supports ongoing maintenance and any insurance needs.
Choosing a shop that emphasizes OEM parts, certified technicians and insurance assistance makes filter replacement part of a broader preventive-care plan with documentation and warranty protection.
Frequently Asked Questions
1. What are the risks of neglecting air filter replacement?
Skipping air filter replacement can reduce engine performance, lower fuel efficiency and increase emissions. A clogged filter restricts airflow, which can make the engine run rich and lead to carbon buildup and premature wear. It can also trigger warning lights tied to the MAF sensor or other intake systems. Regular maintenance, including timely filter changes, helps avoid these costly repairs and keeps your engine running well.
2. Can a dirty air filter affect my vehicle’s warranty?
Yes. Many manufacturers require routine maintenance, including air filter replacement, to keep warranties valid. If a failure is traced to neglected maintenance, a warranty claim could be denied. Follow your owner’s manual and keep service records to remain compliant with warranty terms.
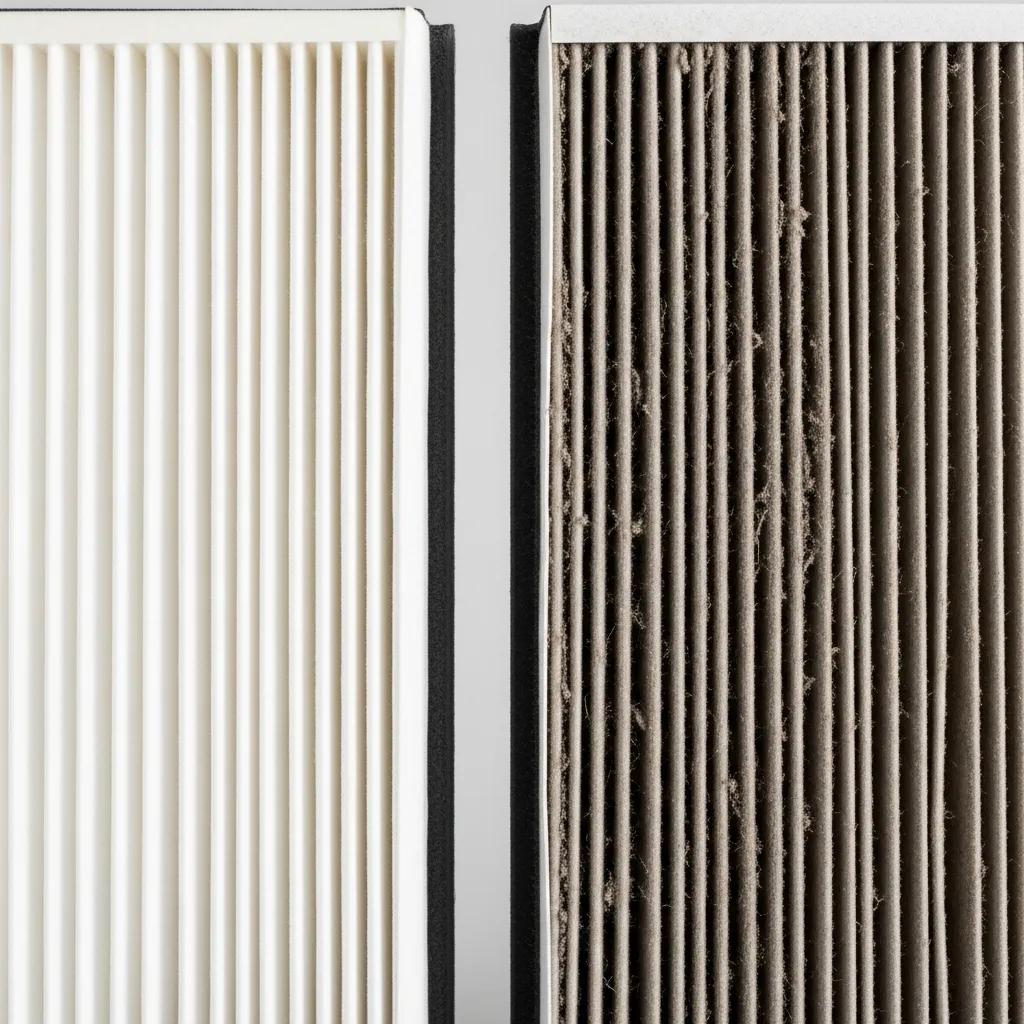
3. How do I visually inspect my air filter?
Find the air filter housing near the engine, open it and remove the filter. Look for heavy dirt, debris, or discoloration in the filter media. A clean filter looks light in color and uniform; a dirty one will be dark, compressed or full of debris. Also check for tears or damage that would let unfiltered air in. When unsure, get a professional opinion.
4. Do different filter types affect performance?
Yes. Paper filters are common and effective for most use. Foam filters suit some off-road setups. High-performance filters (cotton or synthetic) can boost airflow and performance but may need more frequent maintenance. Choose a filter that matches your vehicle and driving conditions, and verify compatibility with the manufacturer’s specs.
5. Will replacing the air filter help with emissions testing?
Yes. A clean air filter improves combustion efficiency and lowers emissions, increasing the likelihood of passing emissions tests. Regular filter maintenance supports emissions compliance and reduces pollutants released into the environment.
6. What if the check engine light comes on after replacing the filter?
If the light appears after a swap, first check that the filter is seated correctly and the housing is sealed. If installation looks correct, read the OBD-II codes to identify the issue. If codes persist, have a technician diagnose potential intake or sensor problems.
7. Can I use a high-performance air filter in my car?
Yes, if it’s compatible with your engine and meets manufacturer recommendations. High-performance filters can improve airflow and efficiency but often require more frequent cleaning or replacement. Check your owner’s manual and consult a professional if you’re concerned about warranty or drivability impacts.
Conclusion
Keeping your air filter fresh is one of the easiest ways to protect engine performance, improve fuel economy and reduce emissions. By recognizing the signs of a clogged filter and following manufacturer guidance — adjusted for your driving conditions — you can prevent avoidable repairs and keep your vehicle running smoothly. Whether you swap the filter yourself or bring the car to a pro, make this simple check part of your regular maintenance. Schedule your air filter replacement today and help your engine stay healthy and efficient.


